Whether you’re a first-time parent, or a veteran mom or dad, you’ll know that making life easier with a new baby is the name of the game. Thanks to my own mom, and a little DIY ingenuity, I came up with the cutest parent-saving hack: the new baby changing station, and it involves everyone’s favorite Ikea RÅSKOG Cart.
One of the ultimate mom hacks I learned with baby number one, and used at the ready with baby number two, is the DIY new baby station. My mom taught me the trick with our first baby girl, Scarlett. My mom – who had four kids of her own – helped me to set up a changing station for the new baby in every room of our house that we used often. The first few months with a new baby is all about survival, and getting through each day as fluidly and easily as you can. Having a new baby station on hand, for diaper blowouts, quick changes, etc. is vital.
Especially if your new baby’s nursery is on a different floor than your main living area, this mom hack is THE BEST. (We live in a two-story house.)
You spend all of this time, energy, and money creating the serene nursery of your dreams for that new baby, and then you actually have the baby and reality sets in. You’re terrified, you’re sore (so sore), parts of your body you never ever thought about are healing, you’re tired (so tired) and sleep-deprived … the second floor nursery can feel like a very far away place.
How to Create a DIY New Baby Changing Station
Set up quick changing stations in your most-used rooms. For us, those room are the master bedroom (particularly because baby sleeps in her bassinet in our master bedroom for the first four to six-ish months), and the living room.

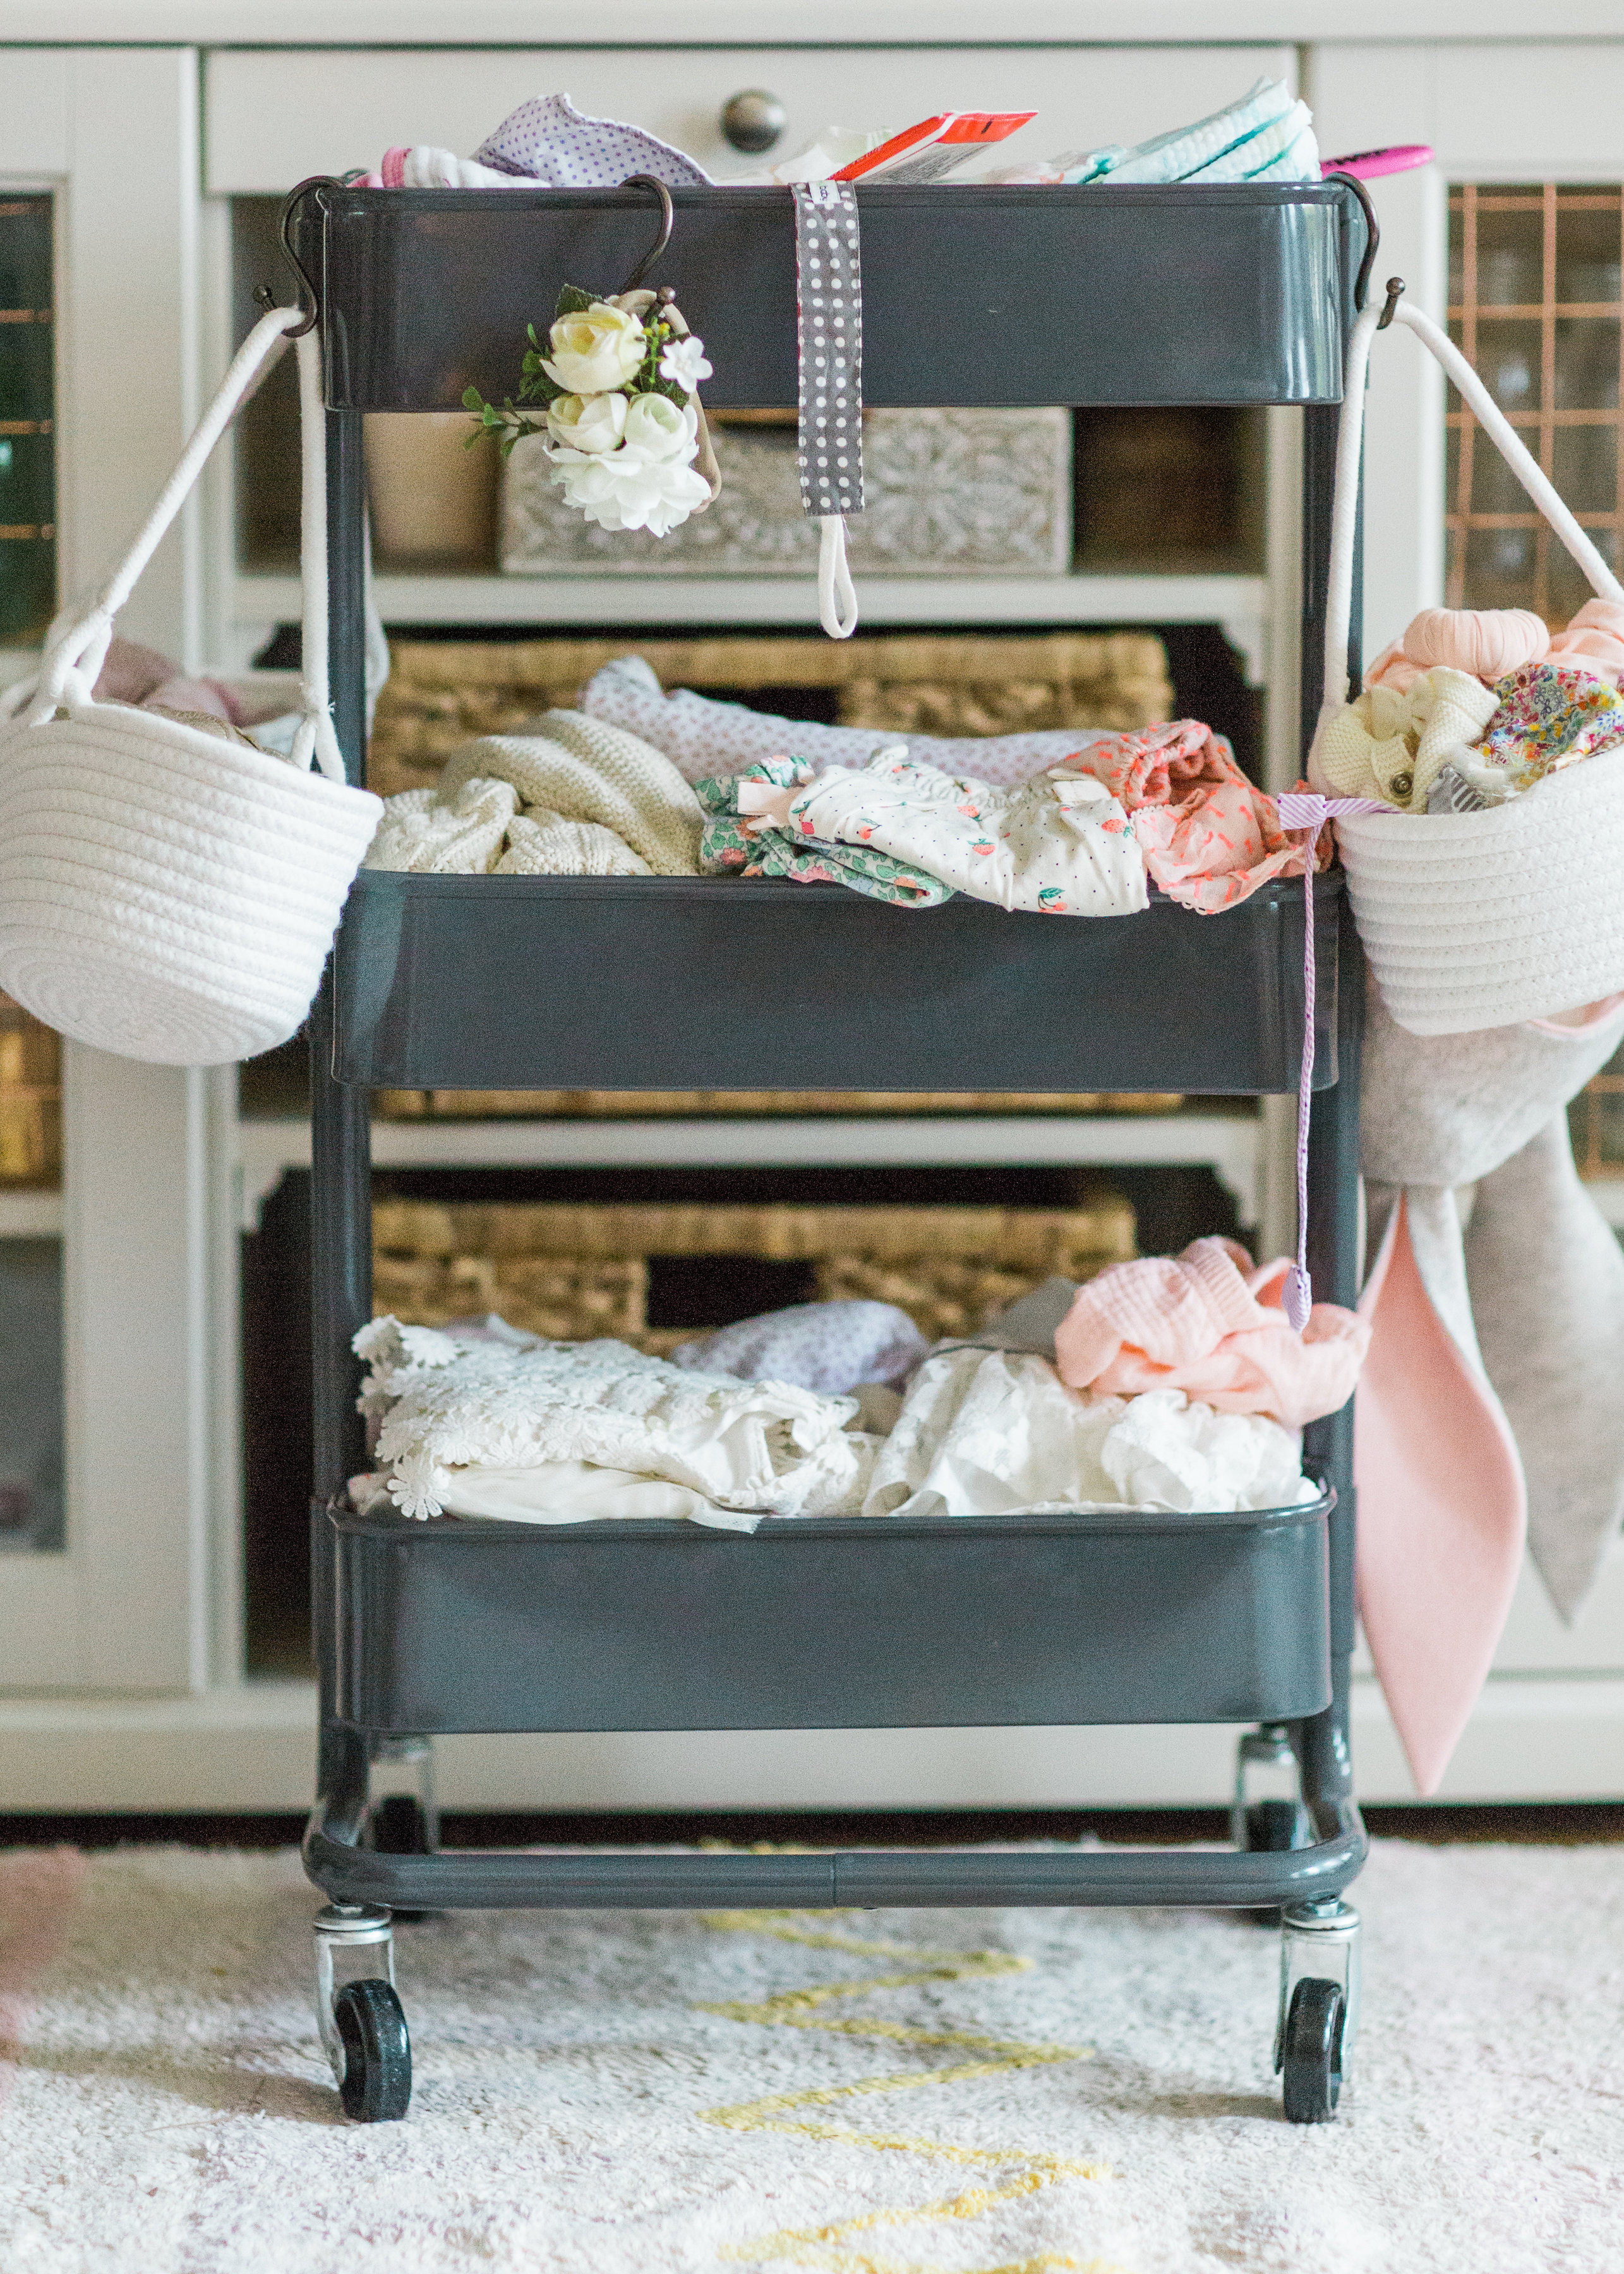
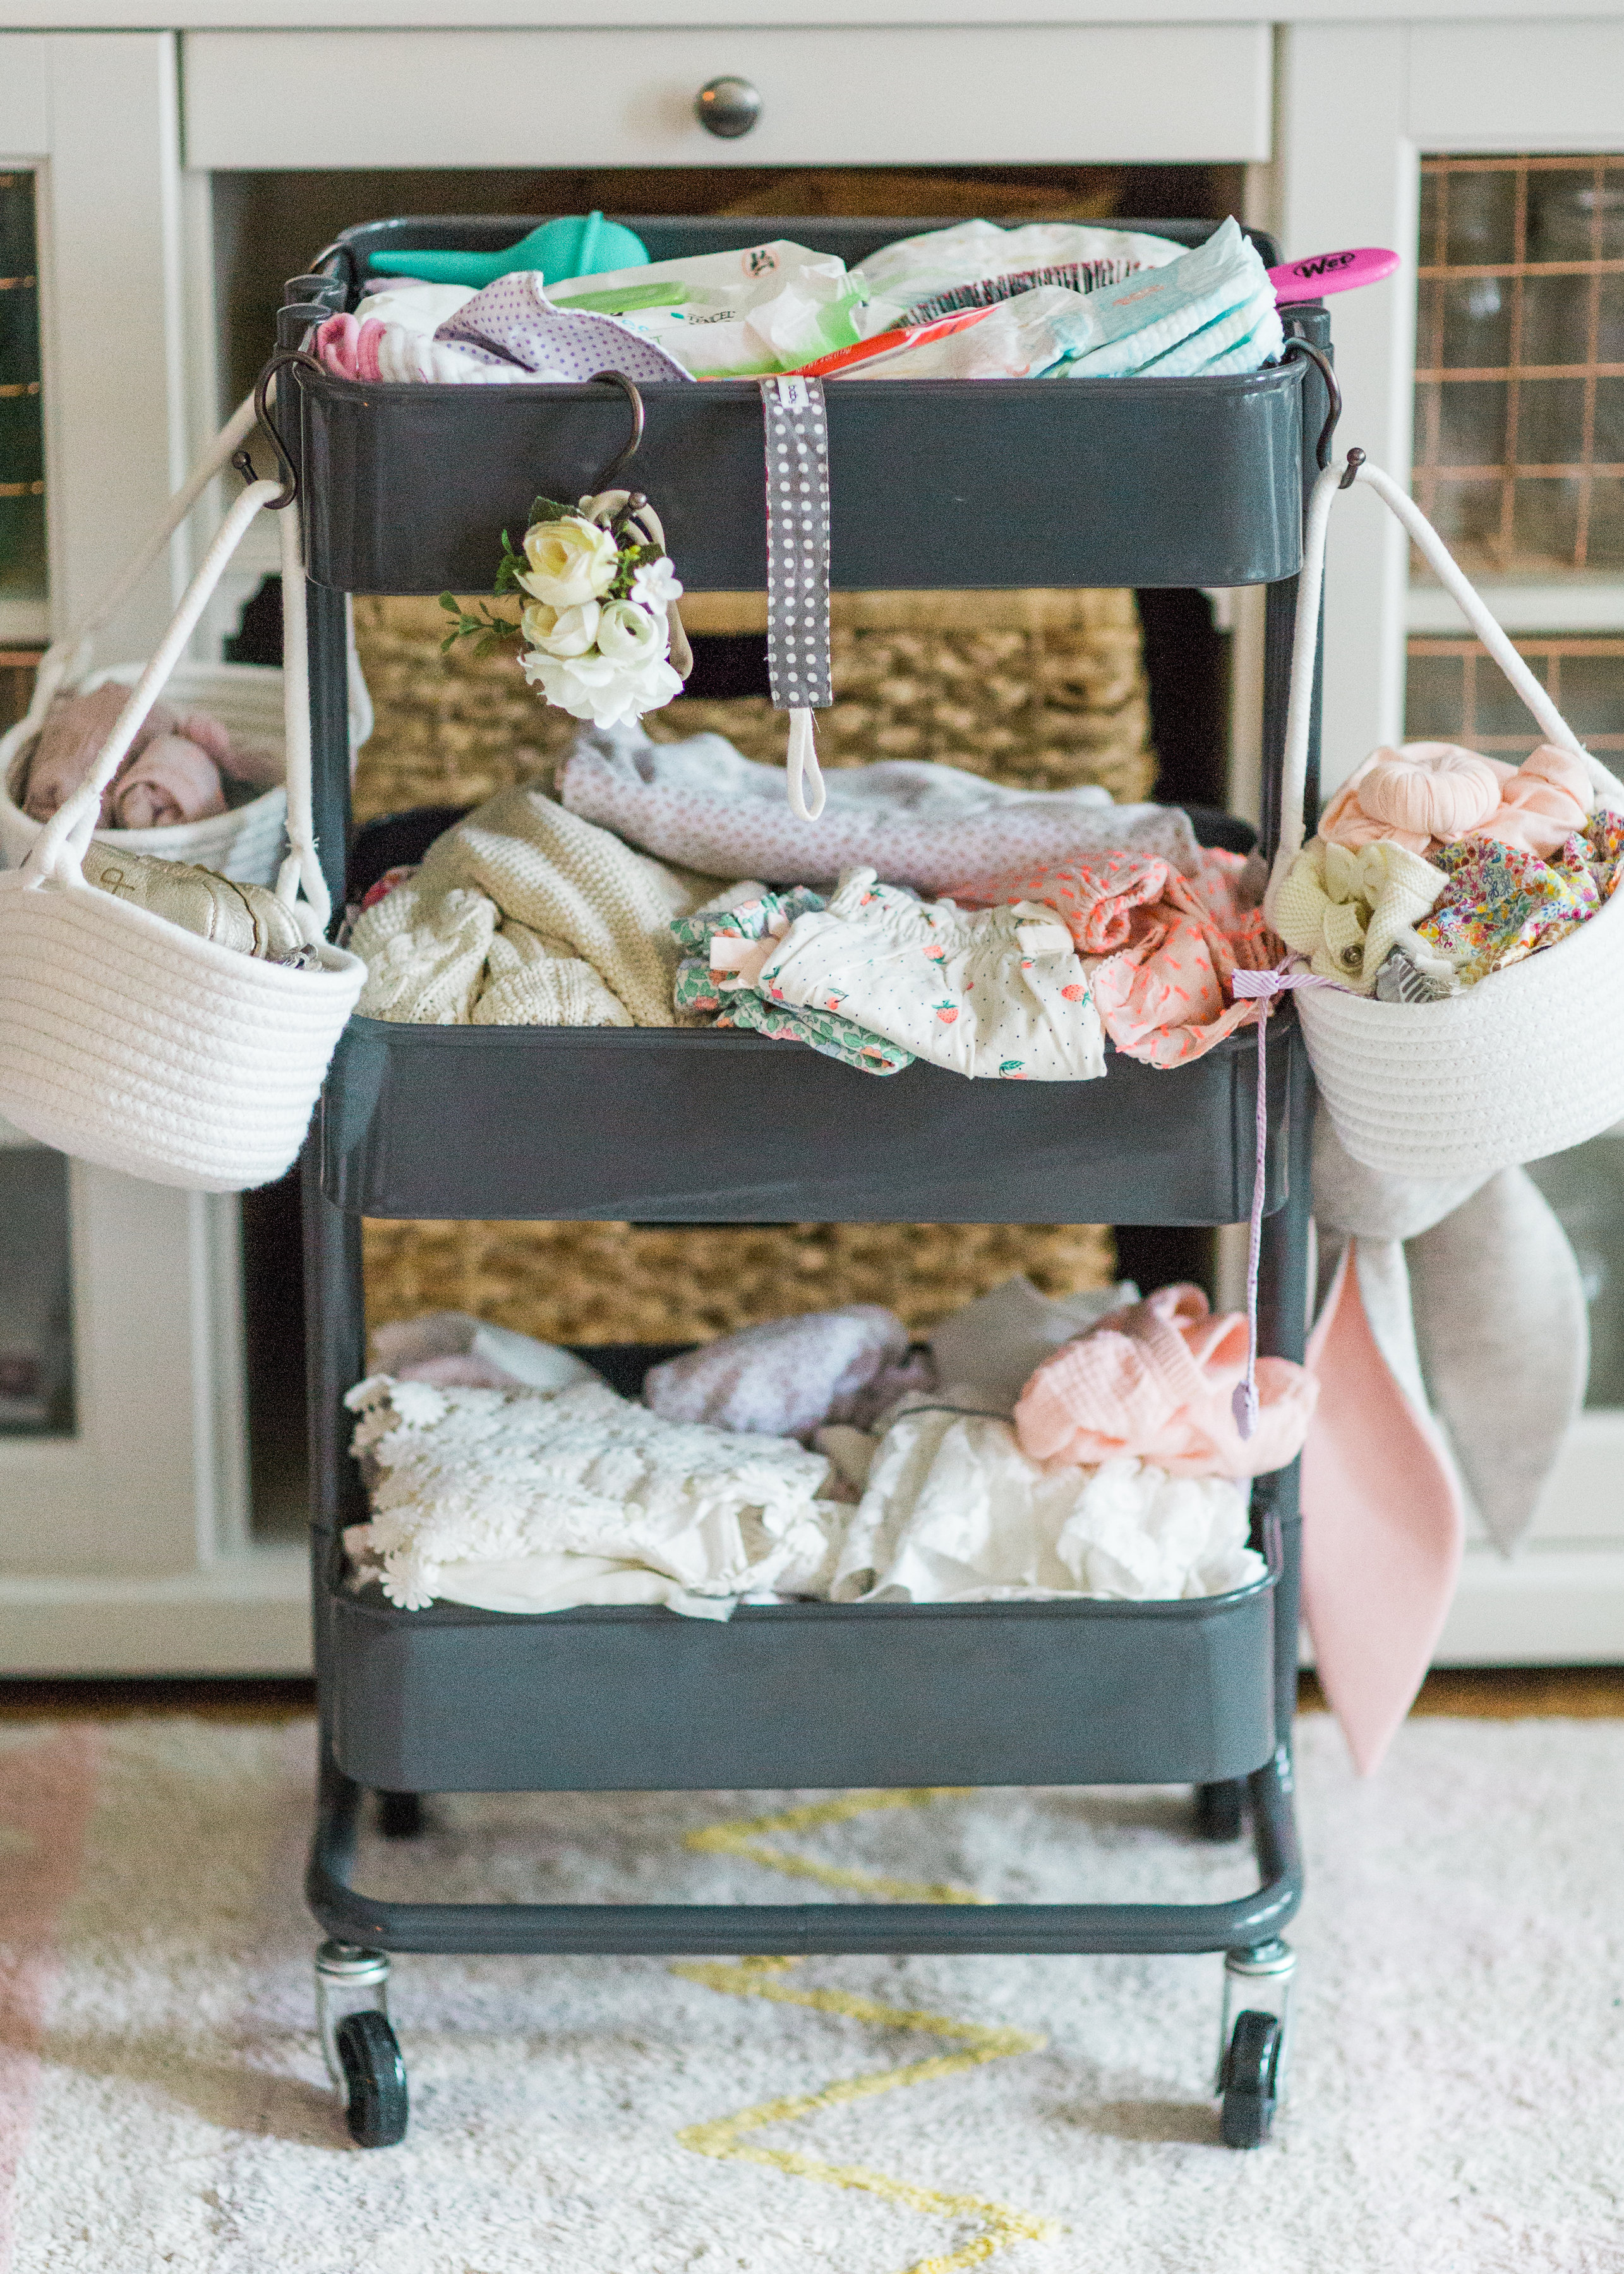
With baby number two we decided to repurpose our Ikea RÅSKOG Cart as the new baby changing station. I should start by saying that I am OBSESSED with this cart. I have used it for SO many purposes – including storage for art supplies, party supplies, as a handy home office cart, and for parties. But the Ikea RÅSKOG cart – turned new baby station – has easily been my favorite Ikea DIY and new mom hack.
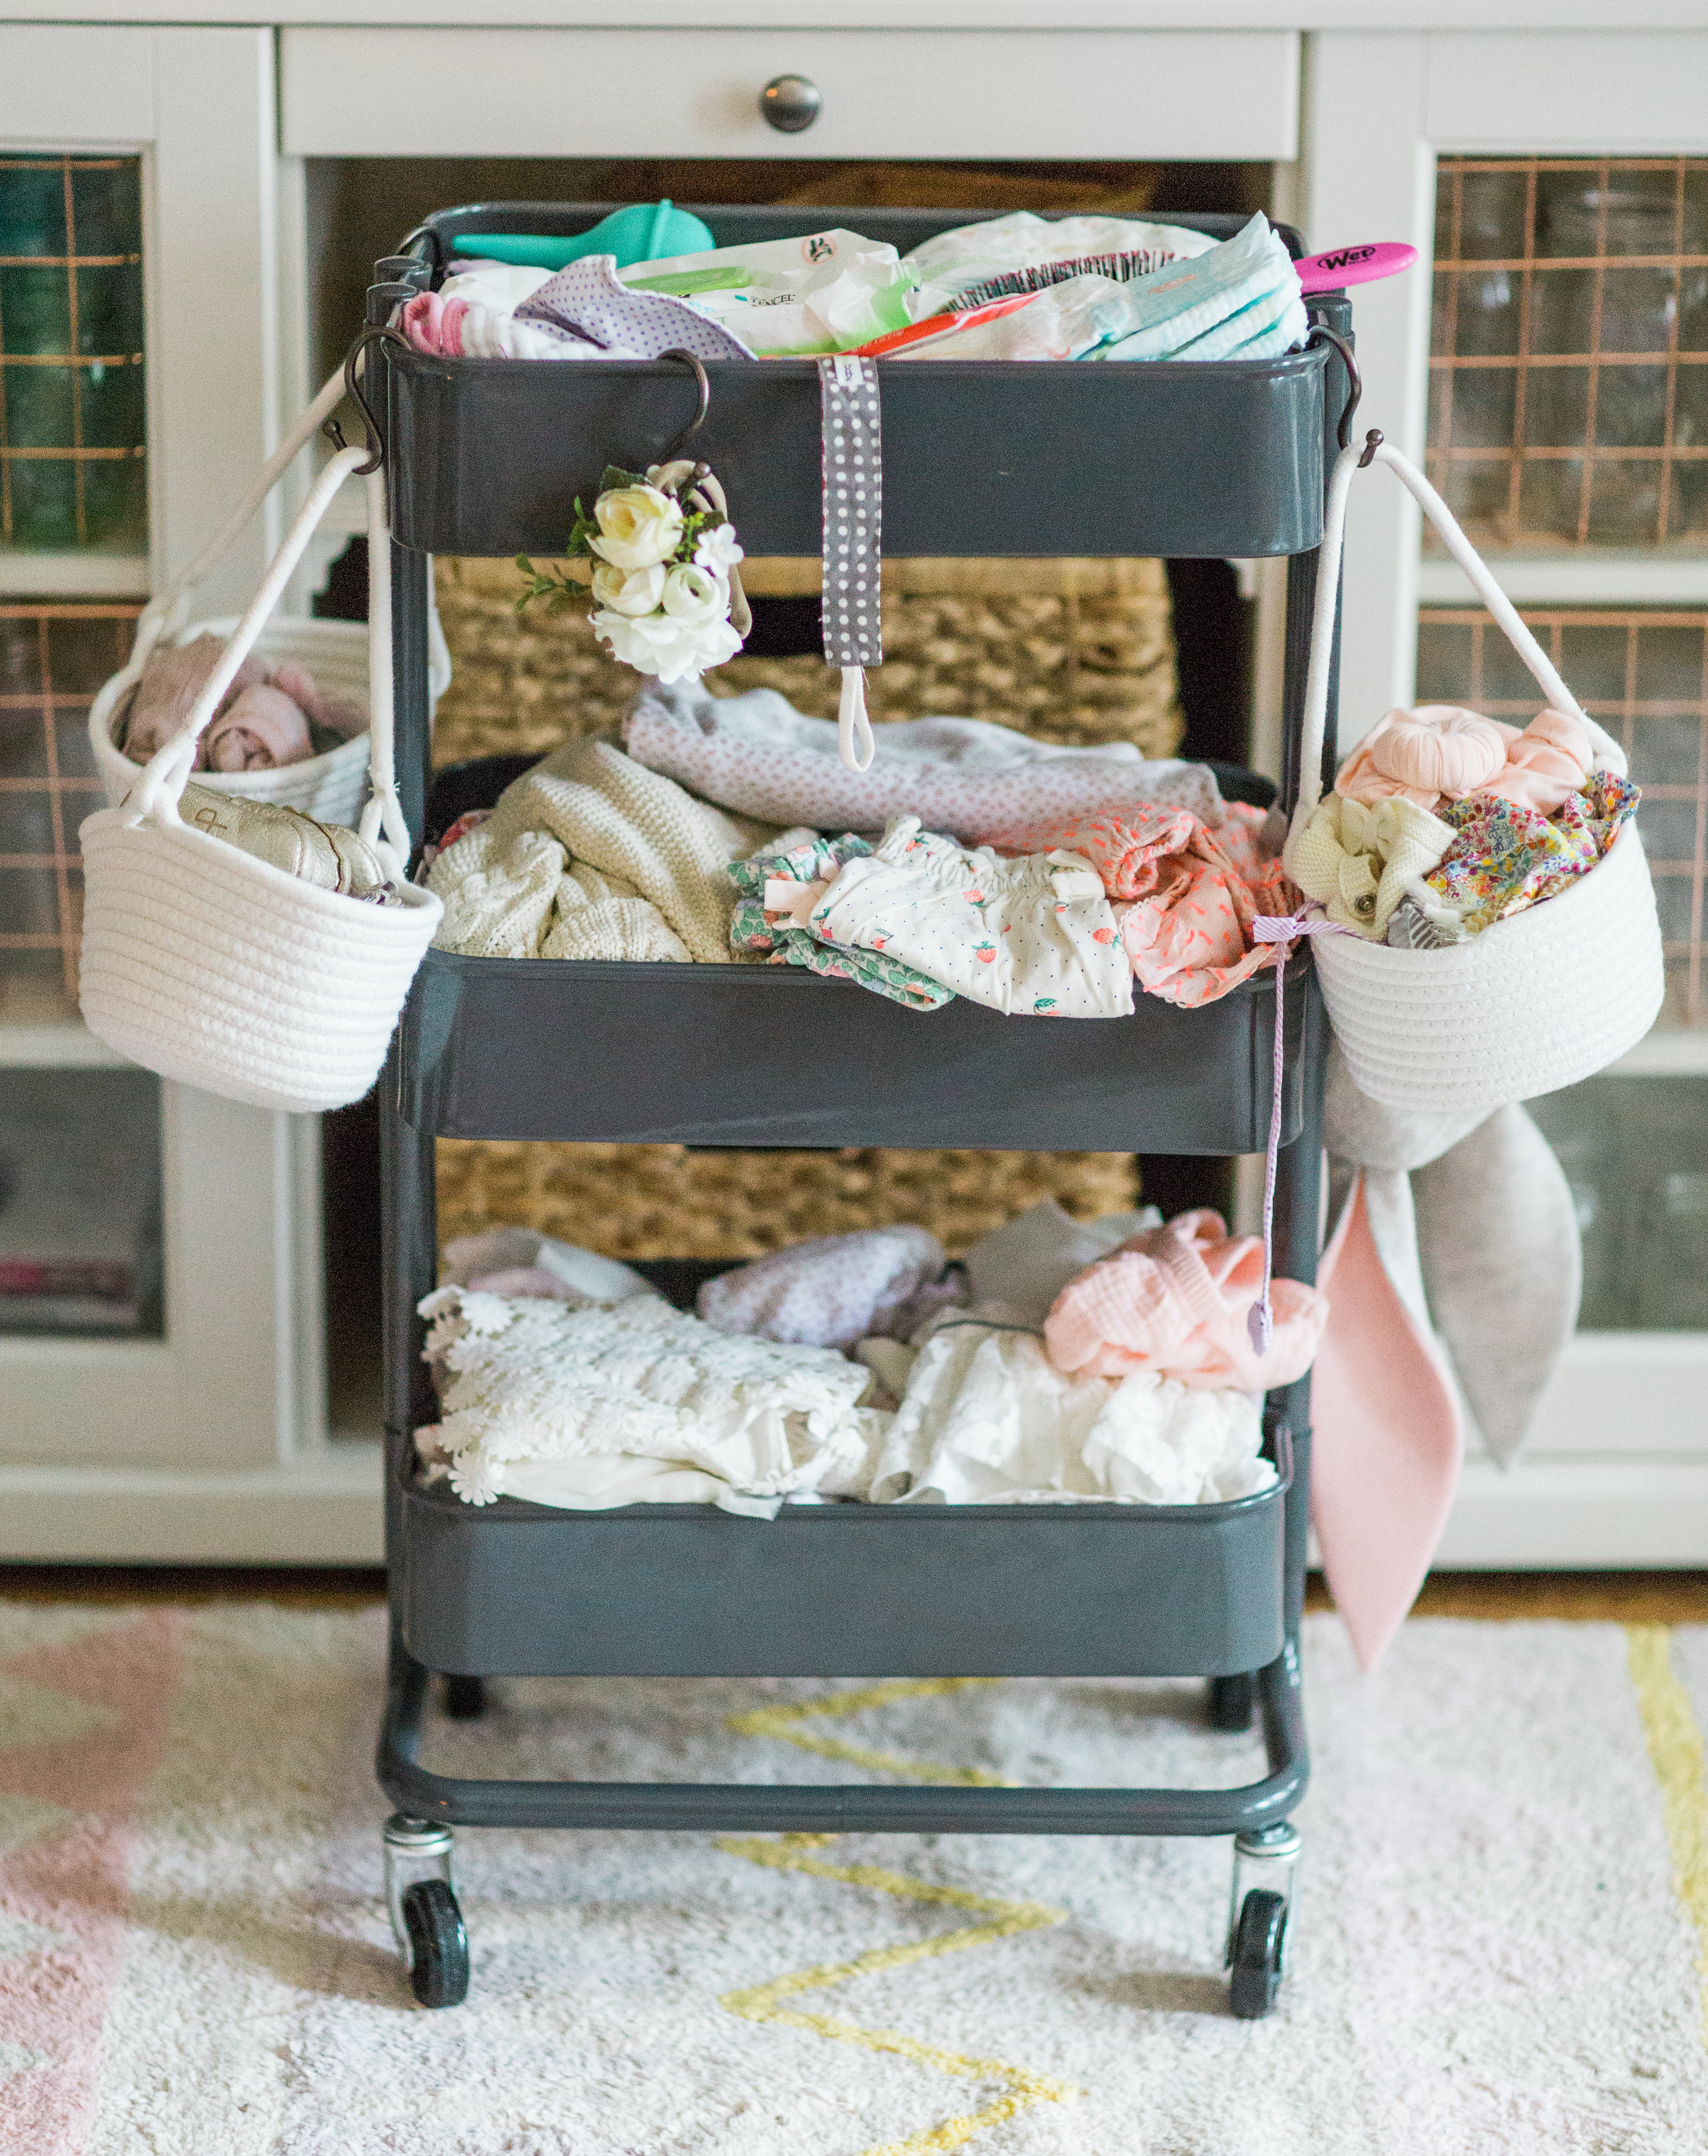
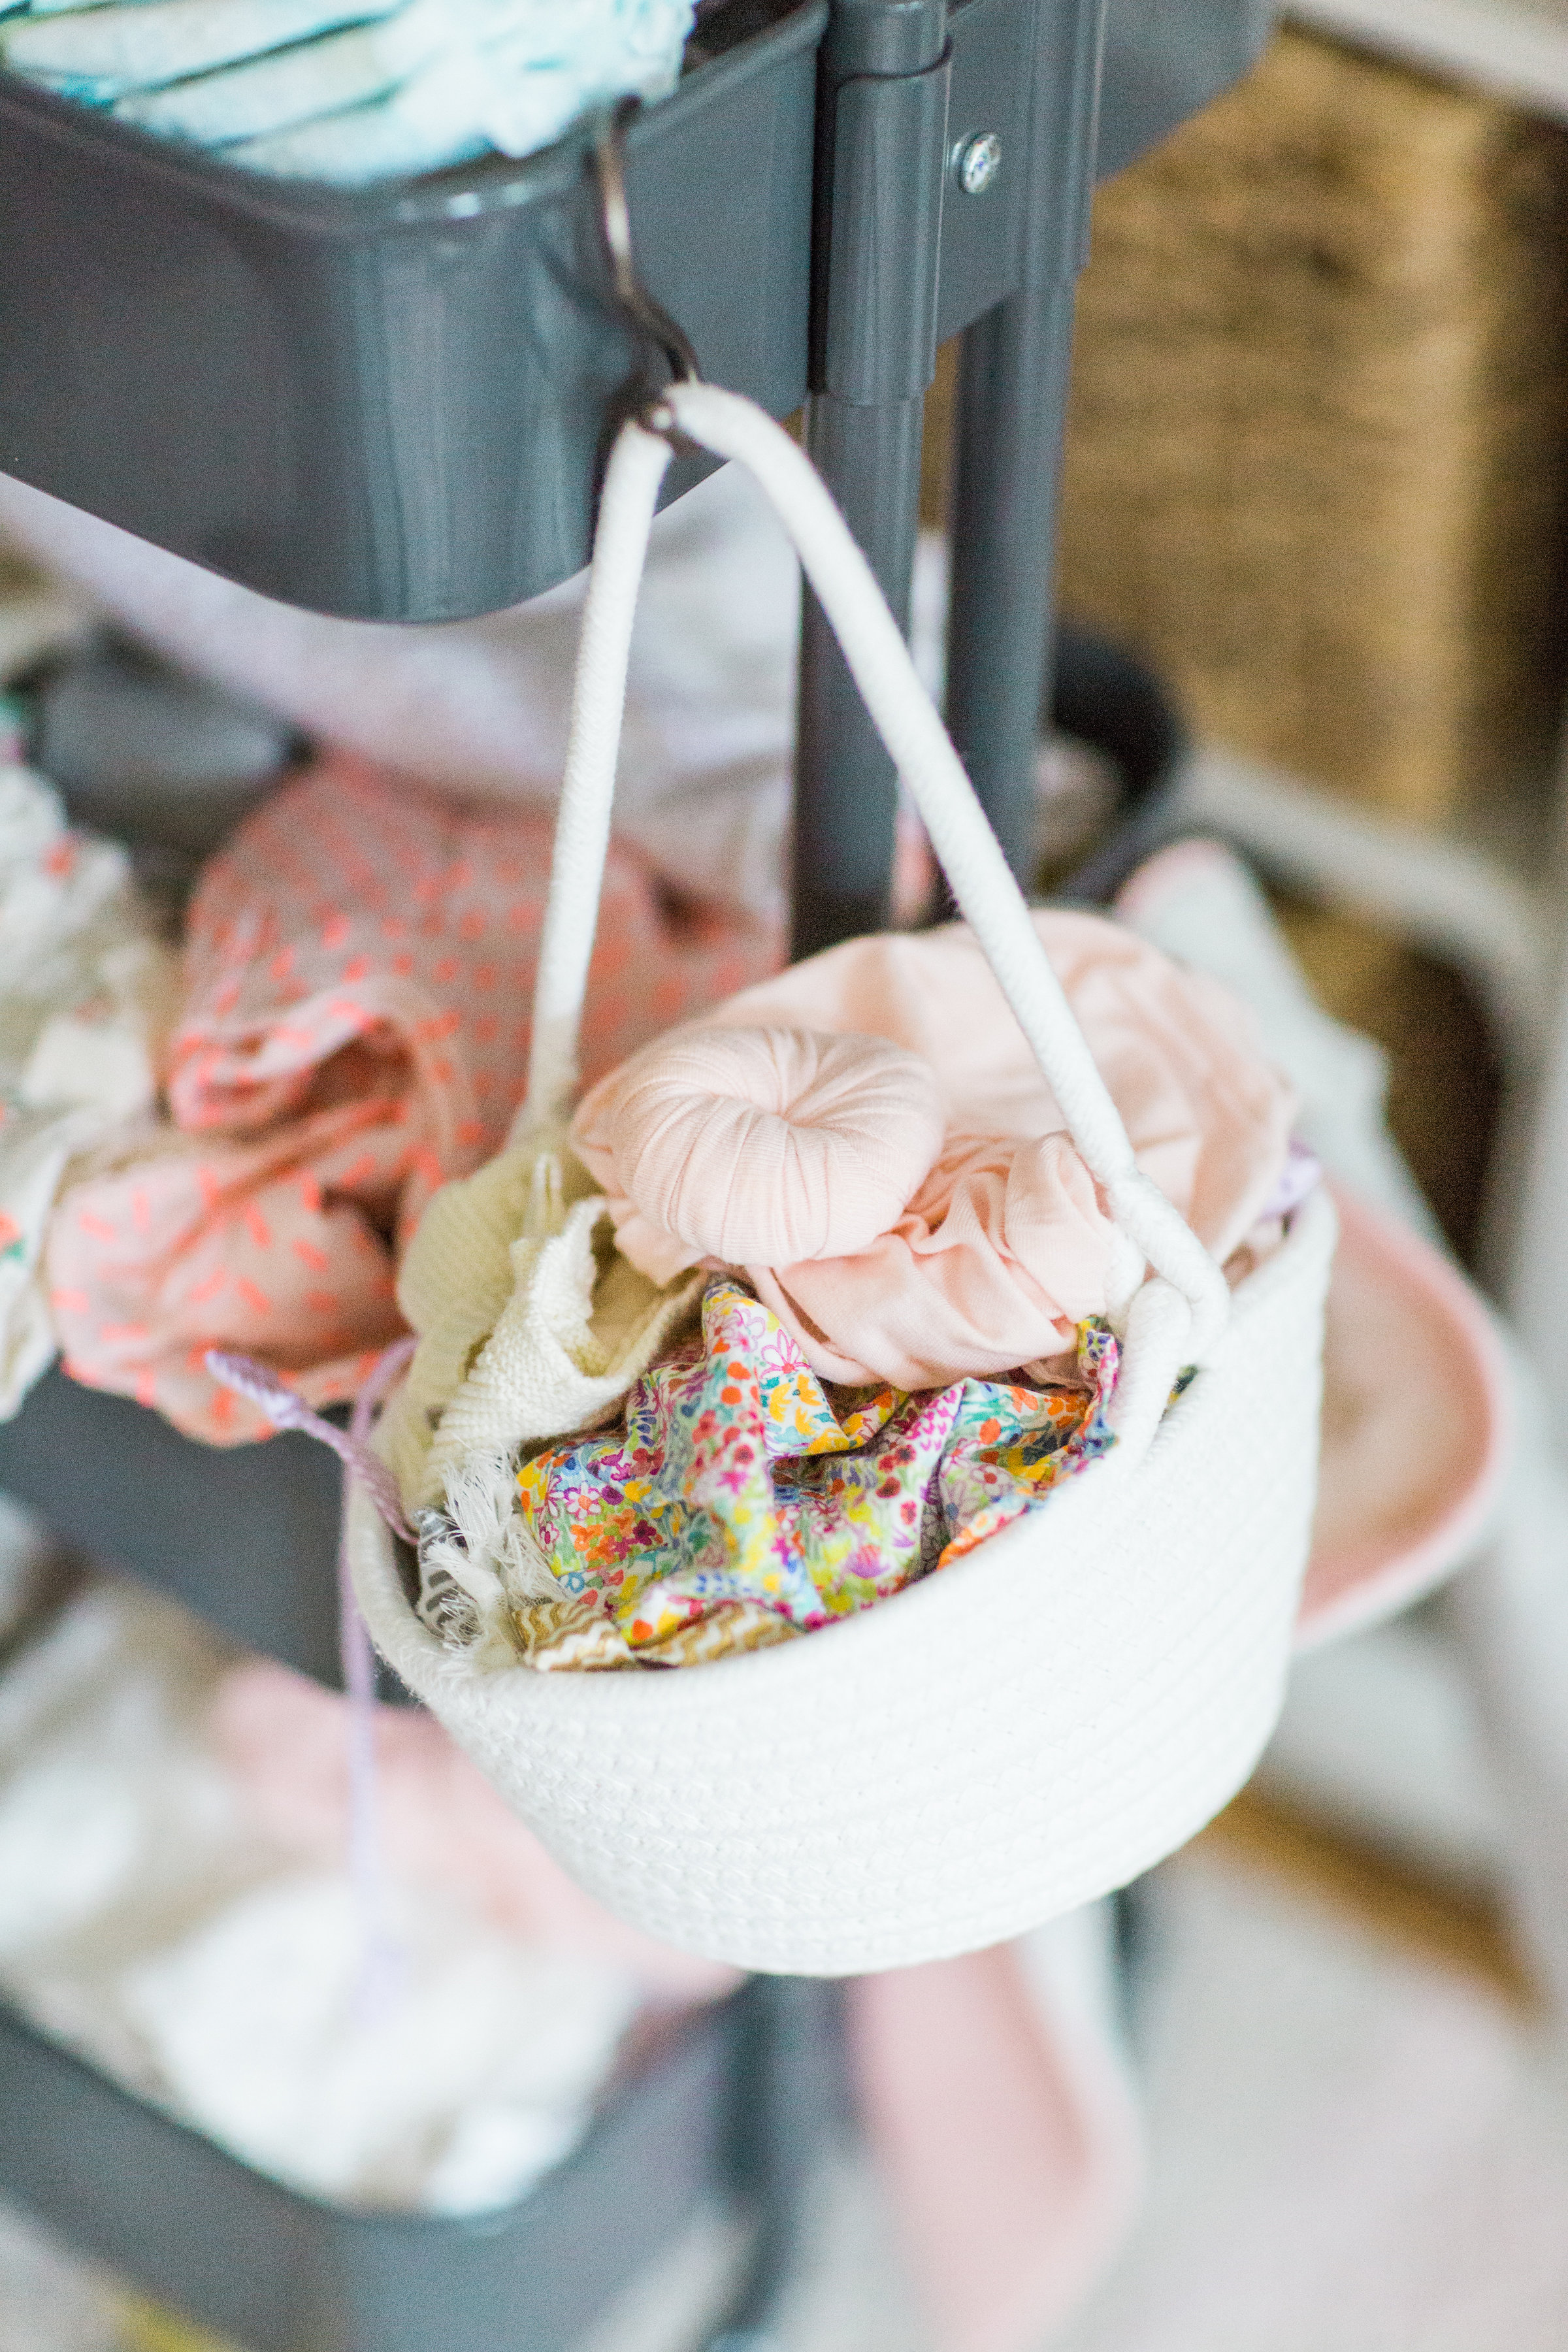
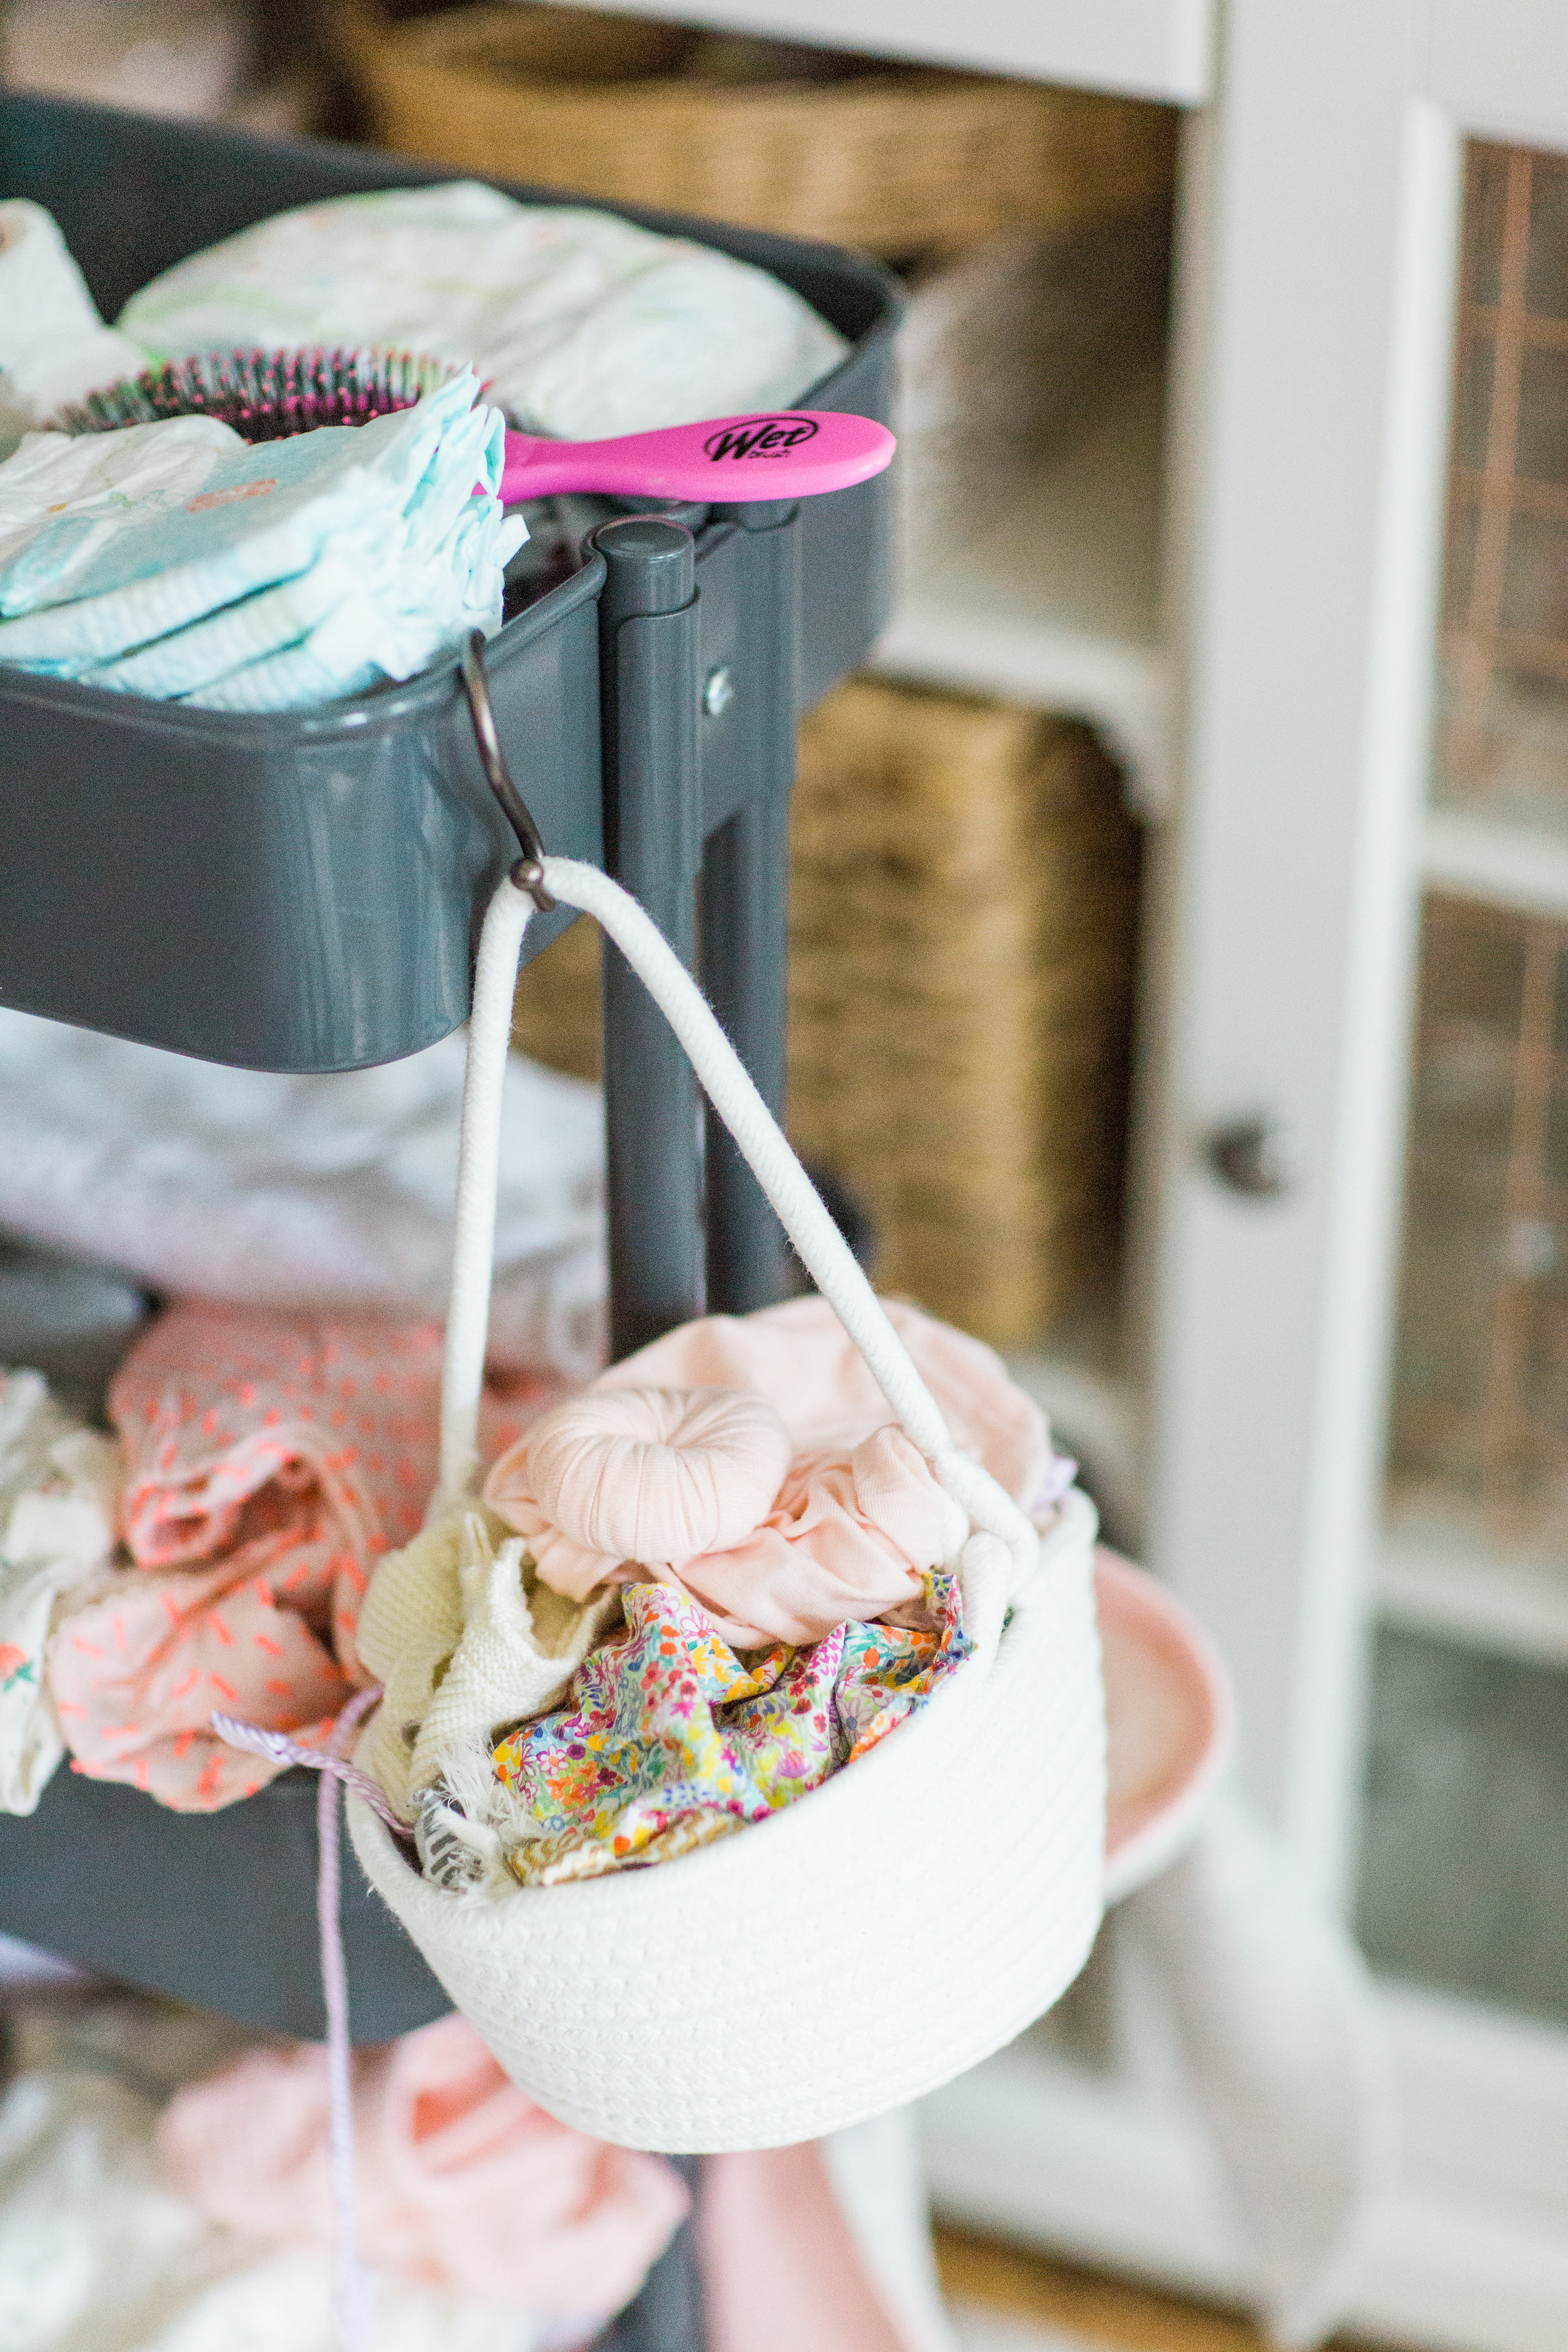
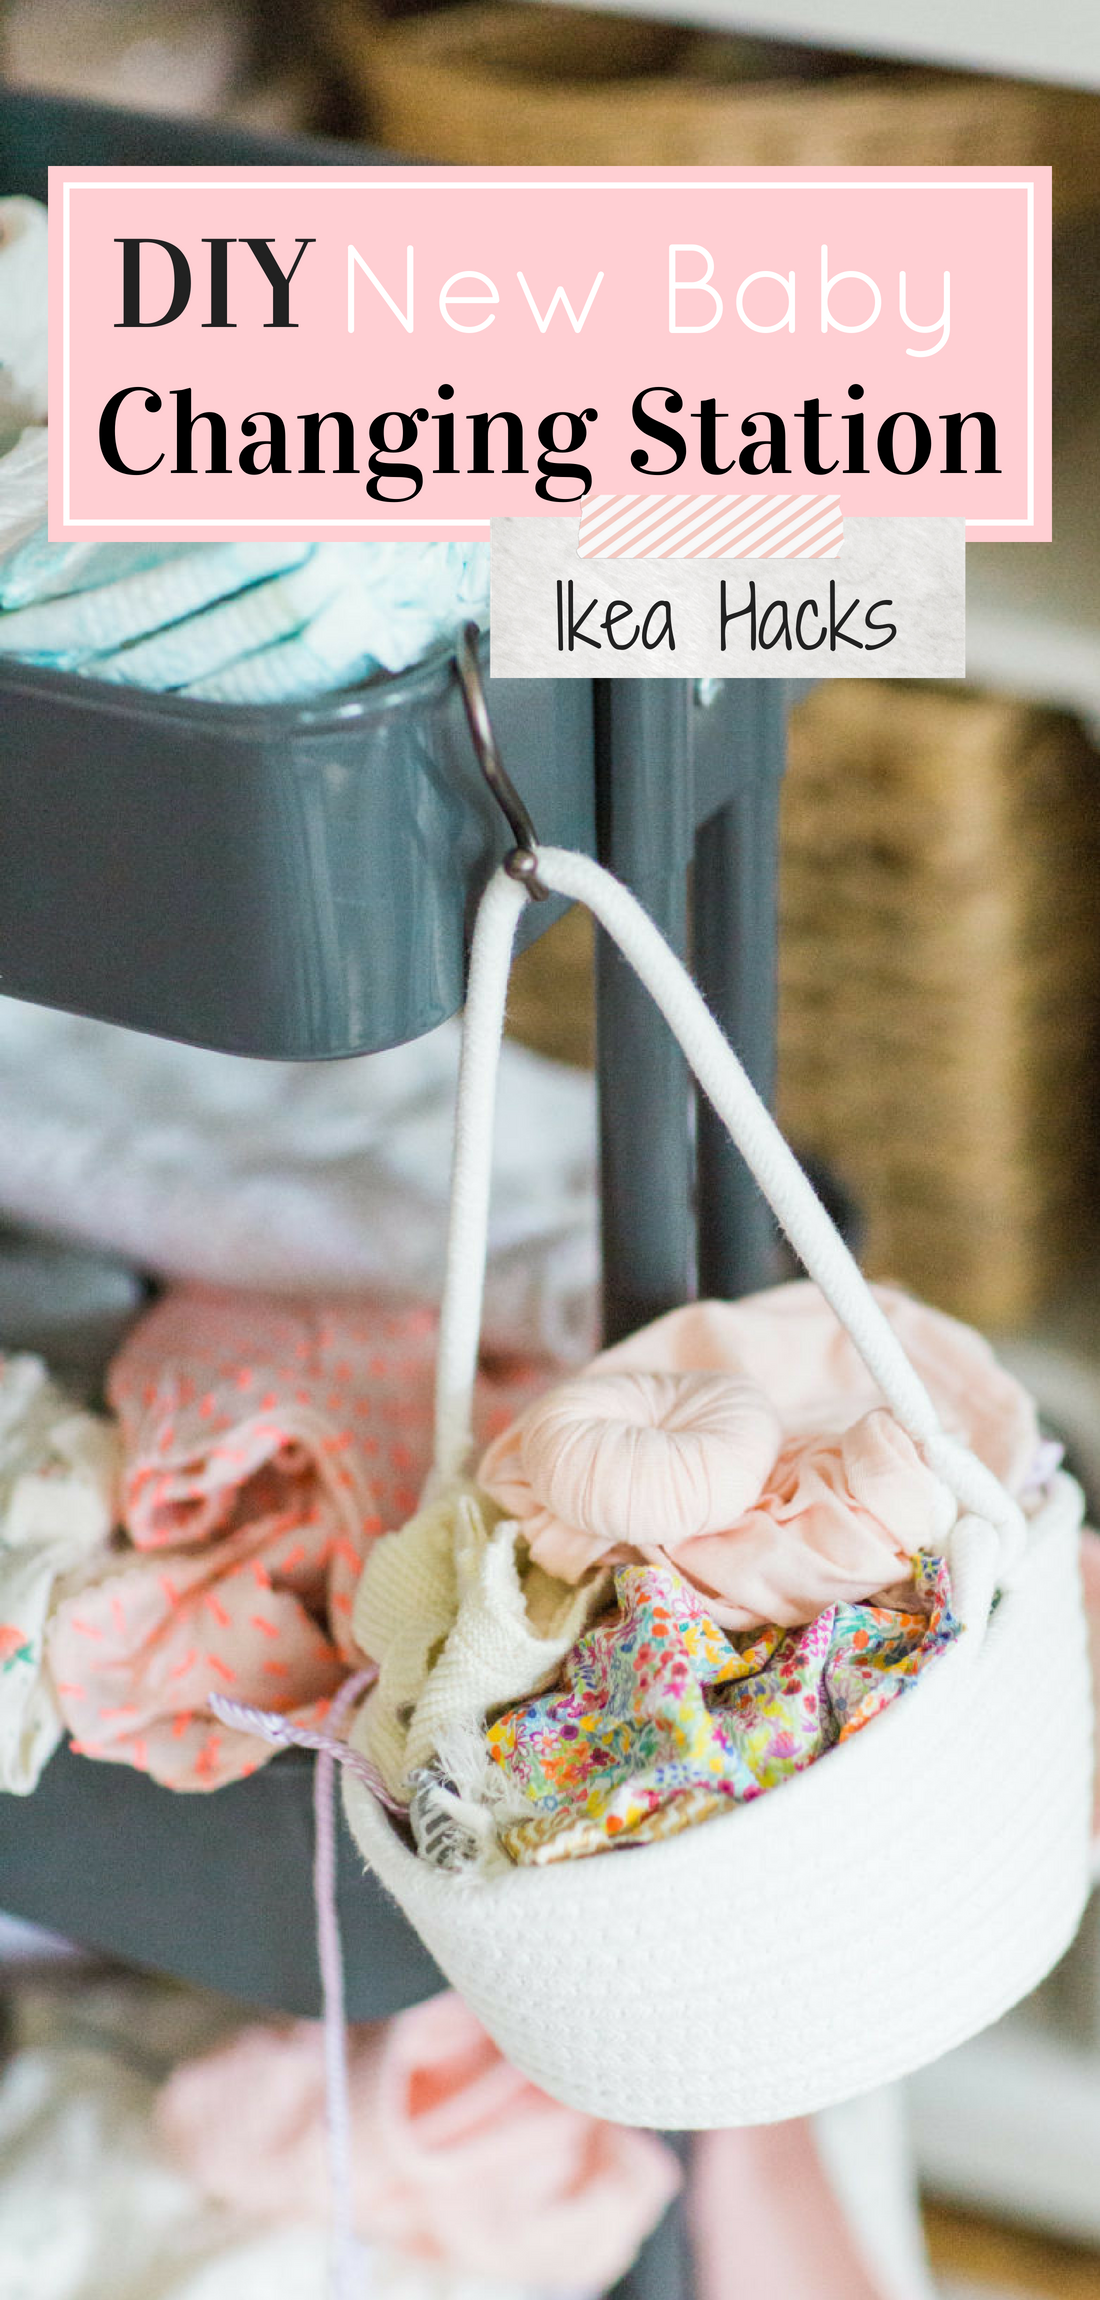
Now I have to give credit where credit is due; our awesome babysitter was the one who actually suggested using SHOWER HOOKS to hang from the cart, holding baskets of the little stuff like baby bonnets, shoes, and socks, and ALL OF THE HEADBANDS. (Because, yes, I have many. No shame in my girl mom game.)
I had bought these totally great rope baskets for our Some Bunny Loves You Kids Easter party picnic shoot, and we realized that the baskets would be perfect for holding all of baby Emmeline’s things.
As for what we fill our new baby changing station with, I promise I’m getting to that!
I mean, who’da thunk shower curtain hooks could be SO multi-purpose?
I actually keep a hairbrush, detangling spray, and a few hair bows for our oldest daughter – now 4 years old – on the living room cart as well. We sometimes finish getting ready there in the morning when there’s too much chaos in the master bedroom, and it’s been really helpful for me to have both girls’ accessories on hand in the main room that we hang out in.
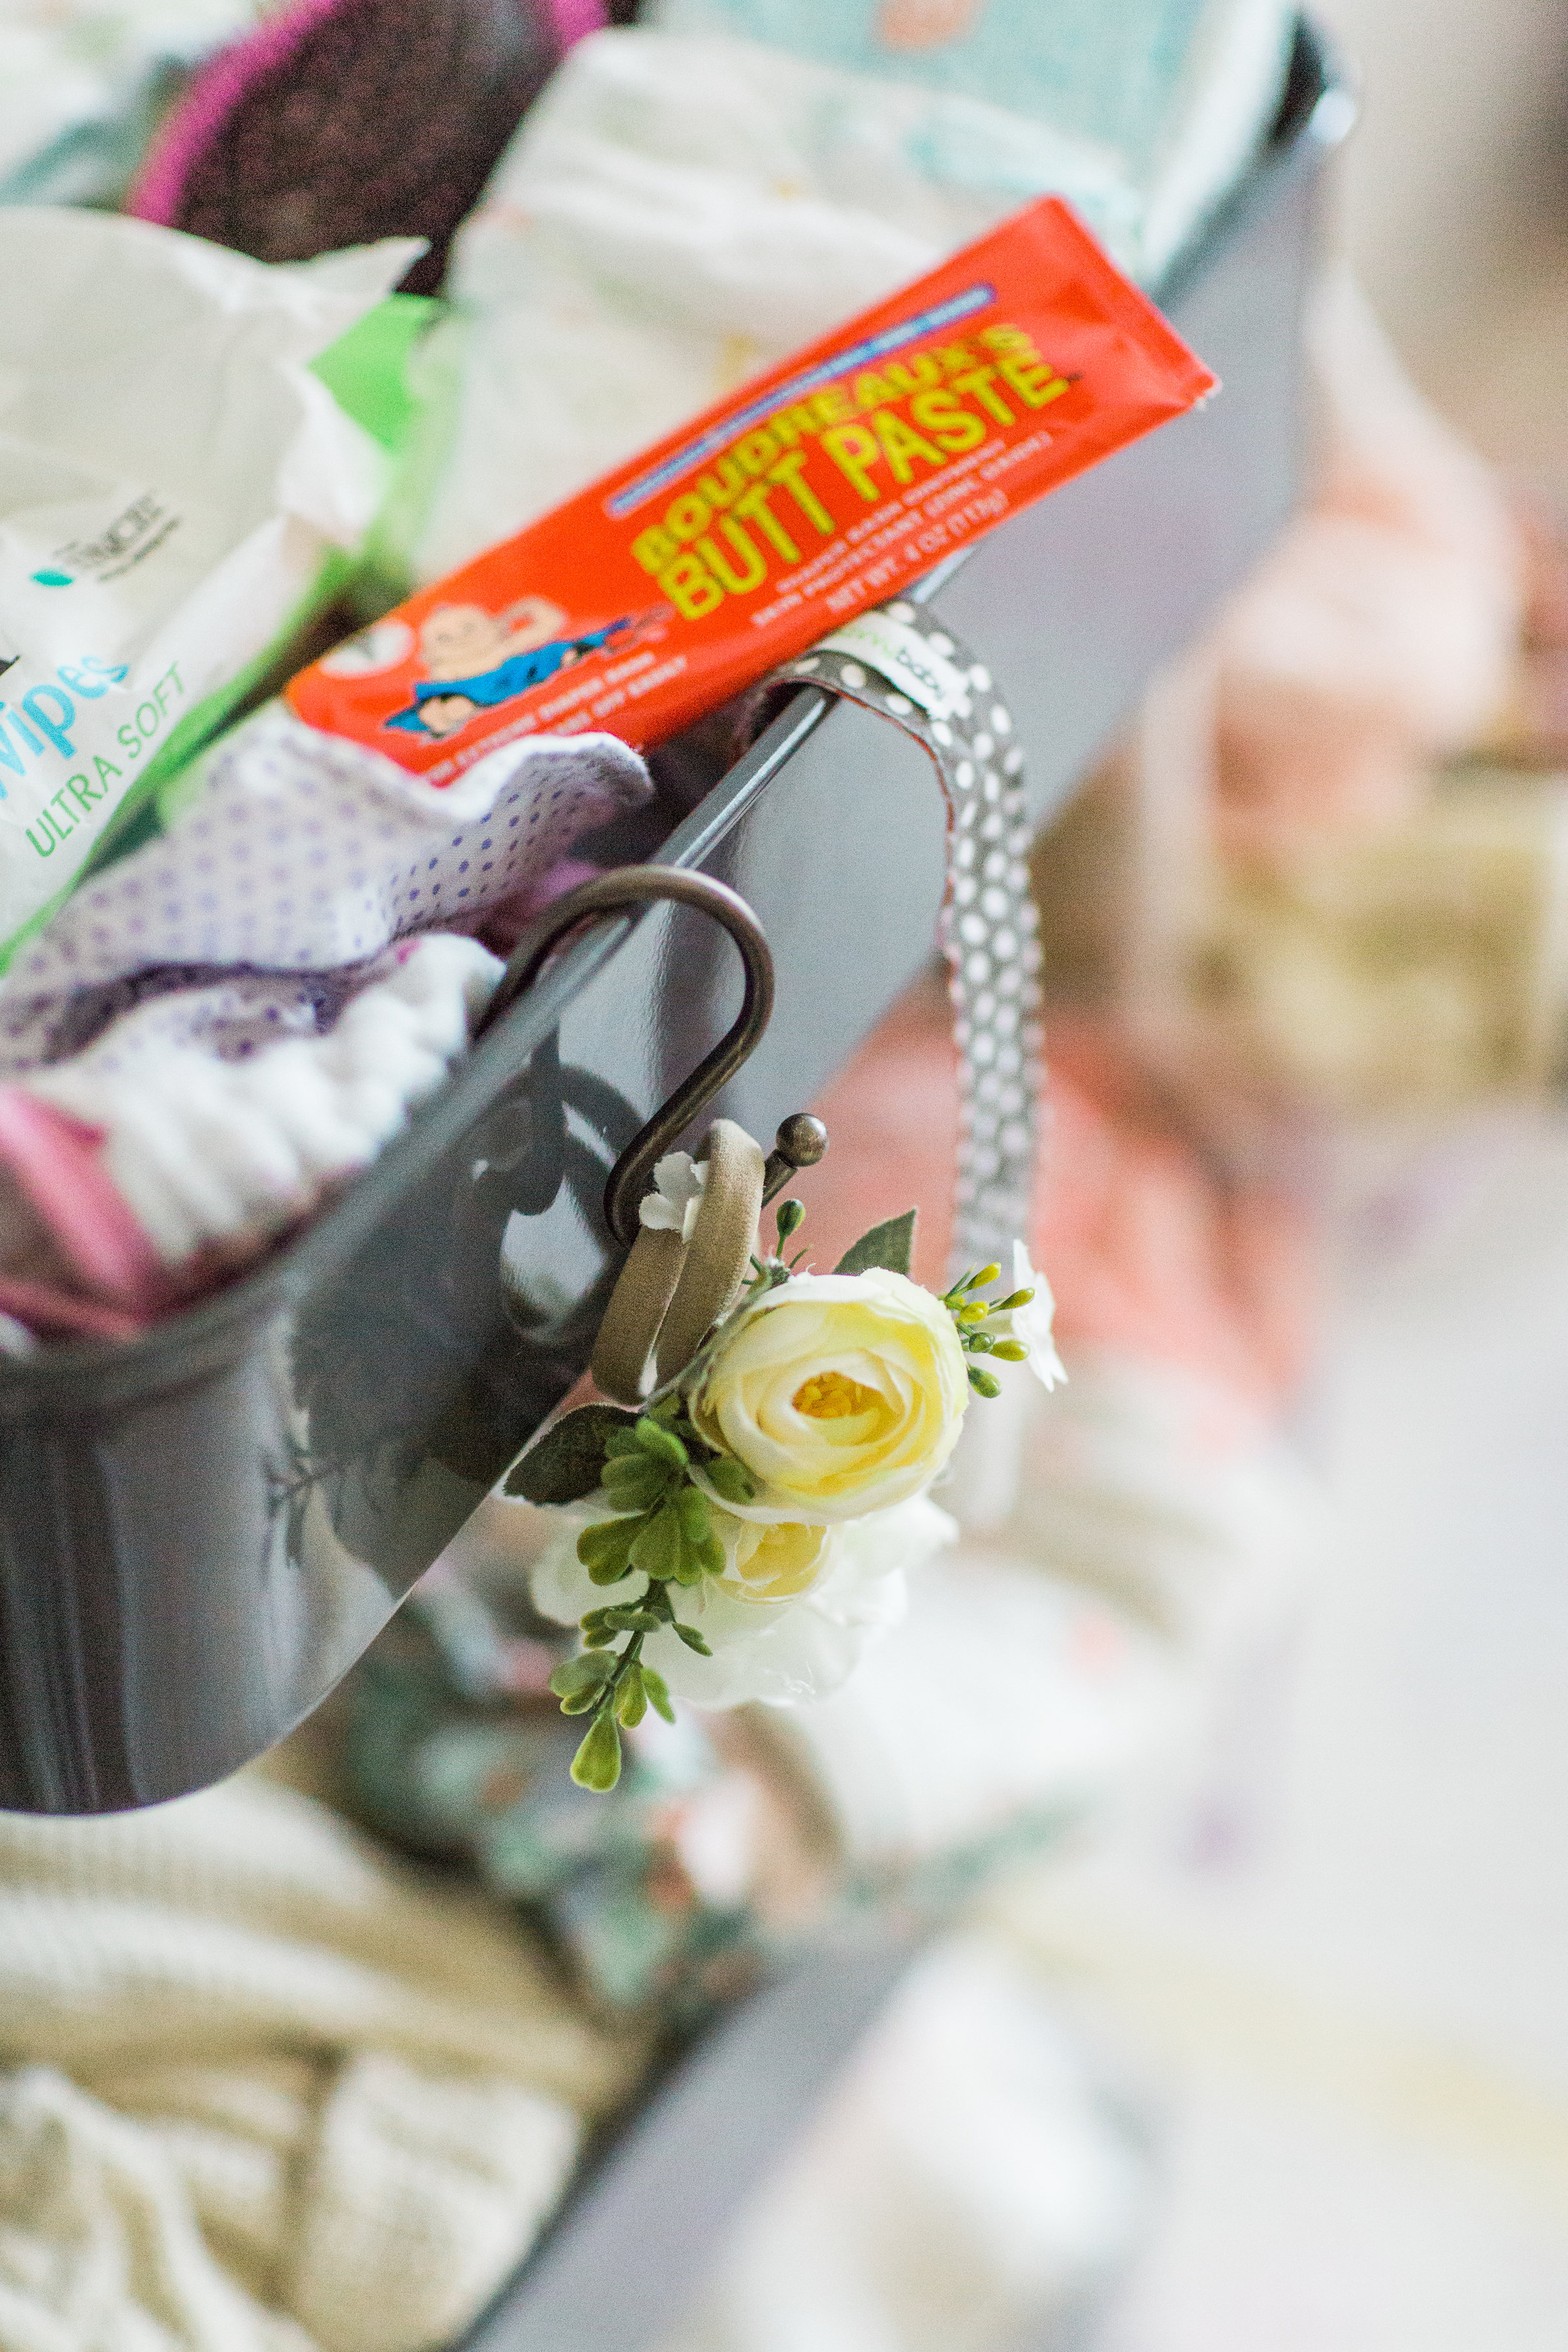
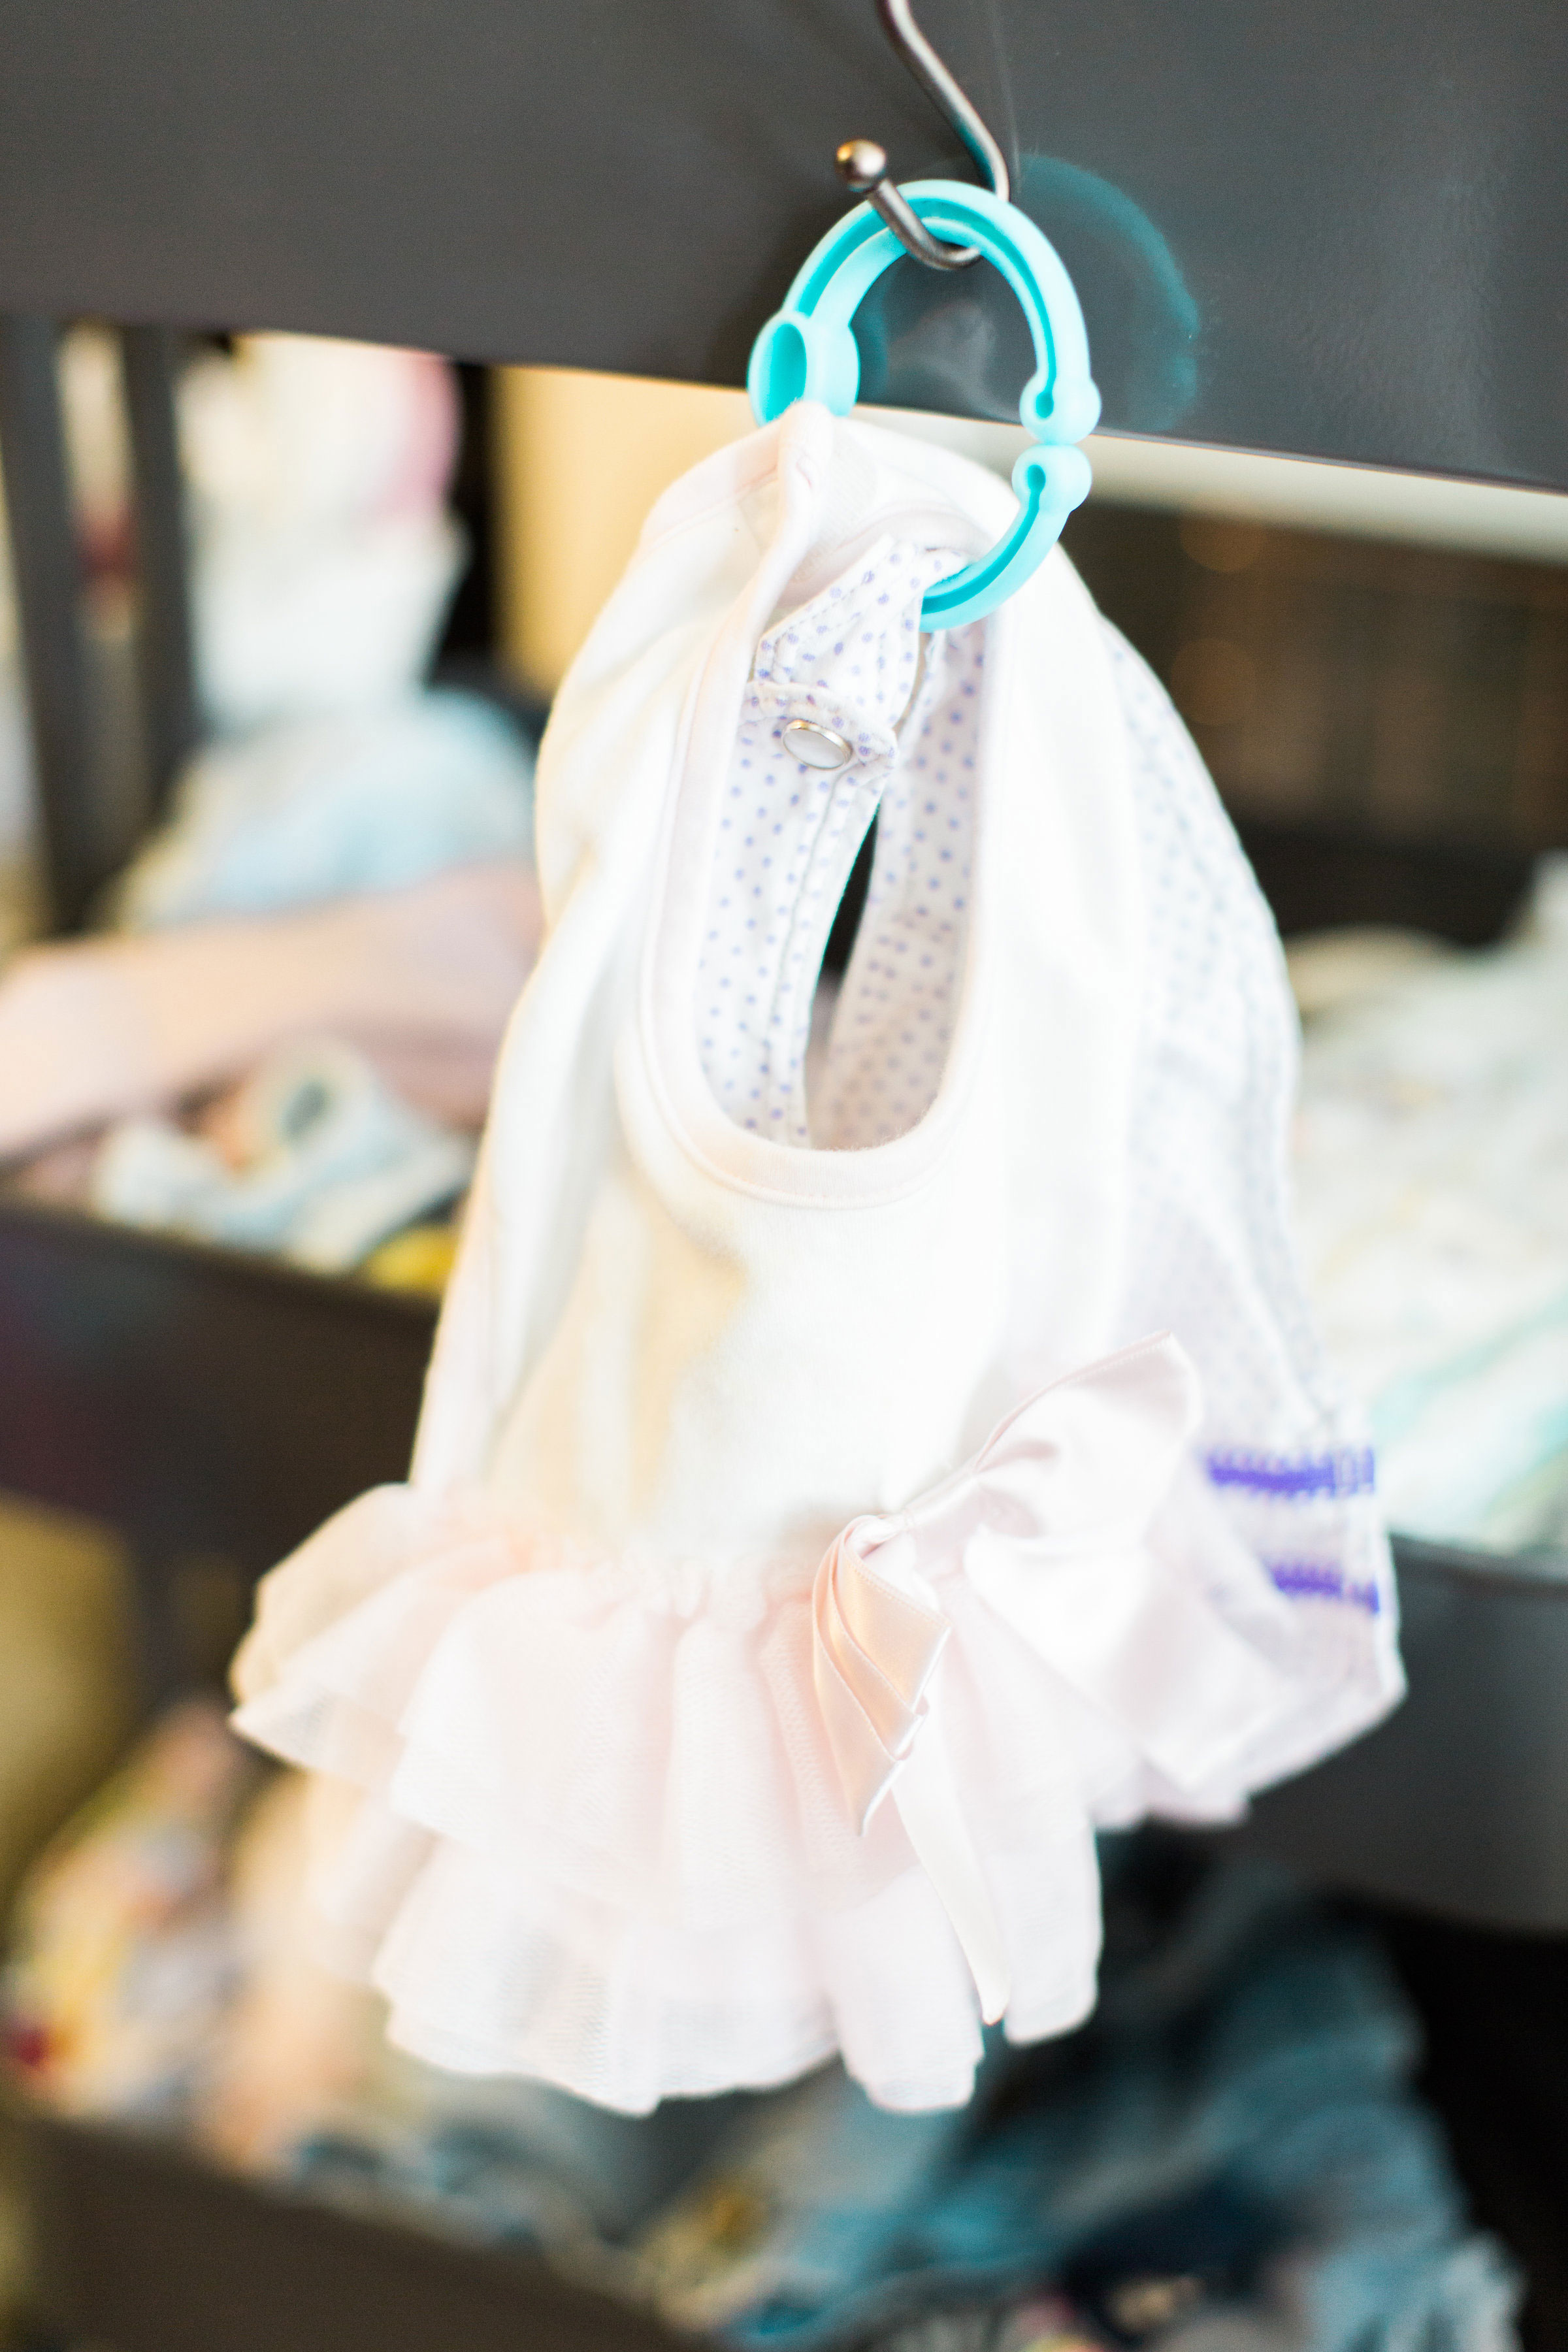
We even found a use for those plastic link rings for baby toys: bib holders!! And goodness do we go through a lot of bibs.
And now for the super simple parent-saving DIY you’ve all been waiting for …
Ikea RÅSKOG Cart Hack: DIY New Baby Changing Station
WHAT YOU’LL NEED
- 1 Ikea RÅSKOG Cart (We love the RÅSKOG Cart because it’s mobile, a.k.a., on wheels, and affordable!)
- lightweight baskets or bins with a handle (like these rope baskets)
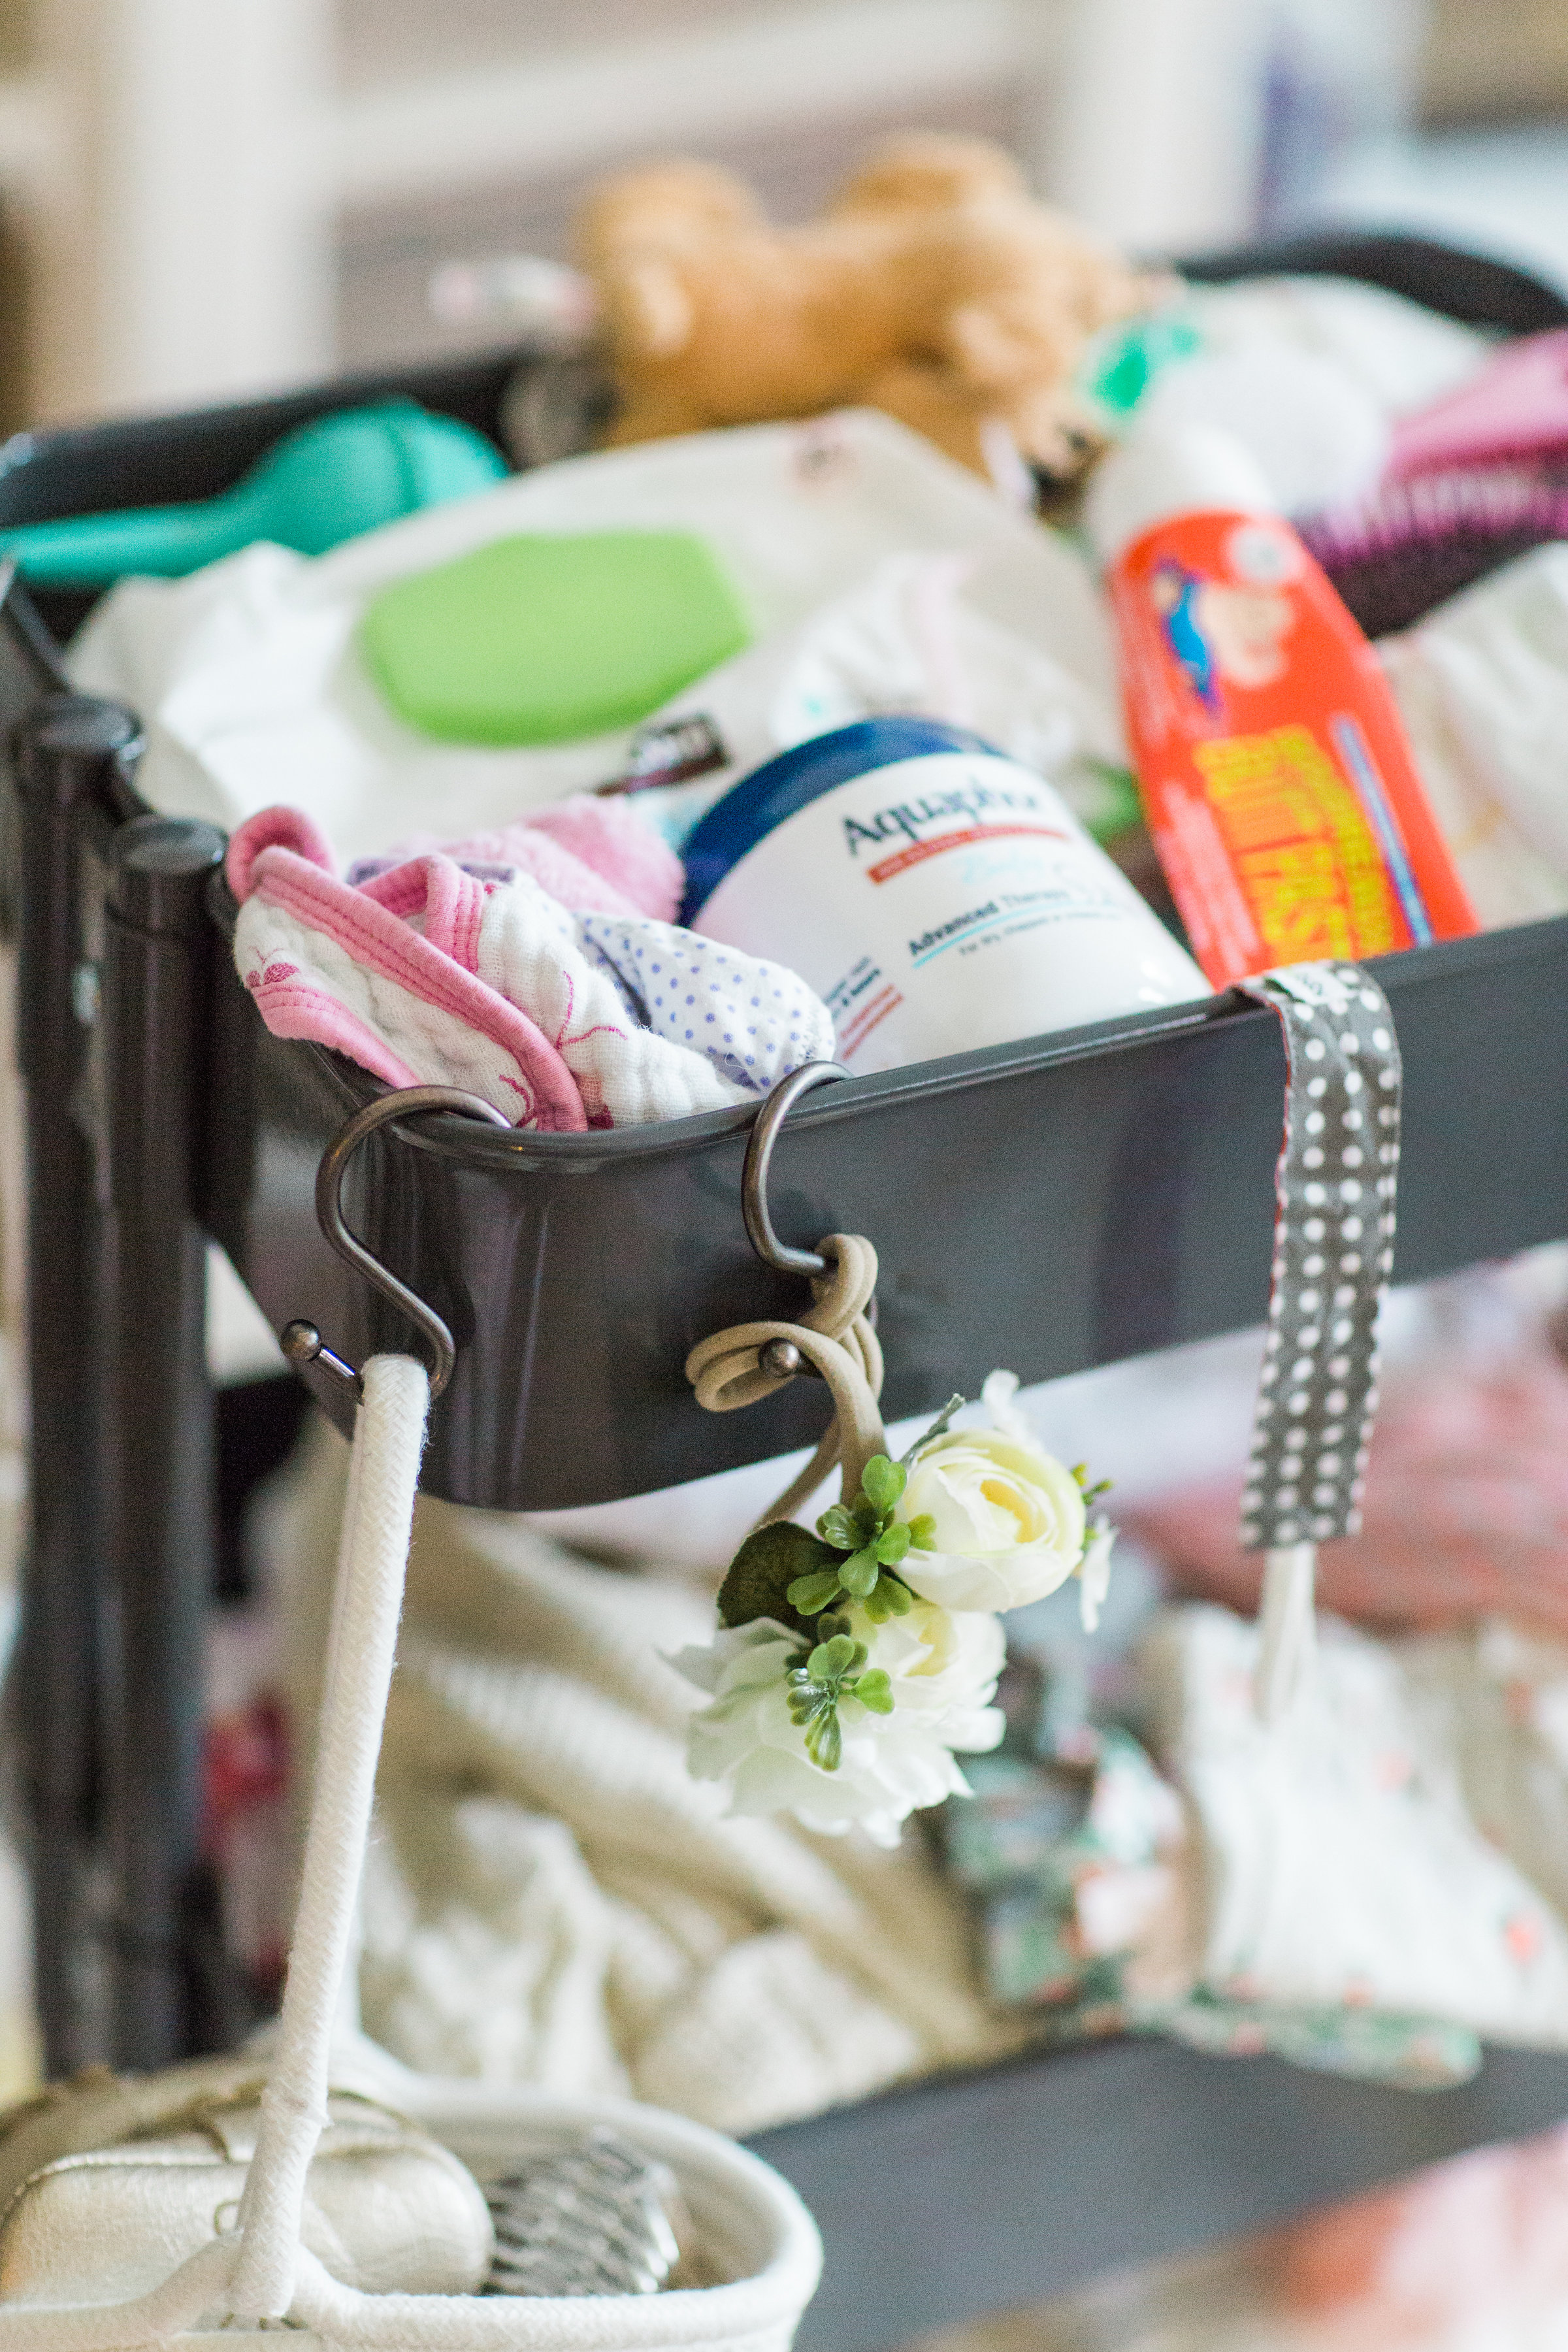
- shower “S hooks”
- baby link rings (optional)
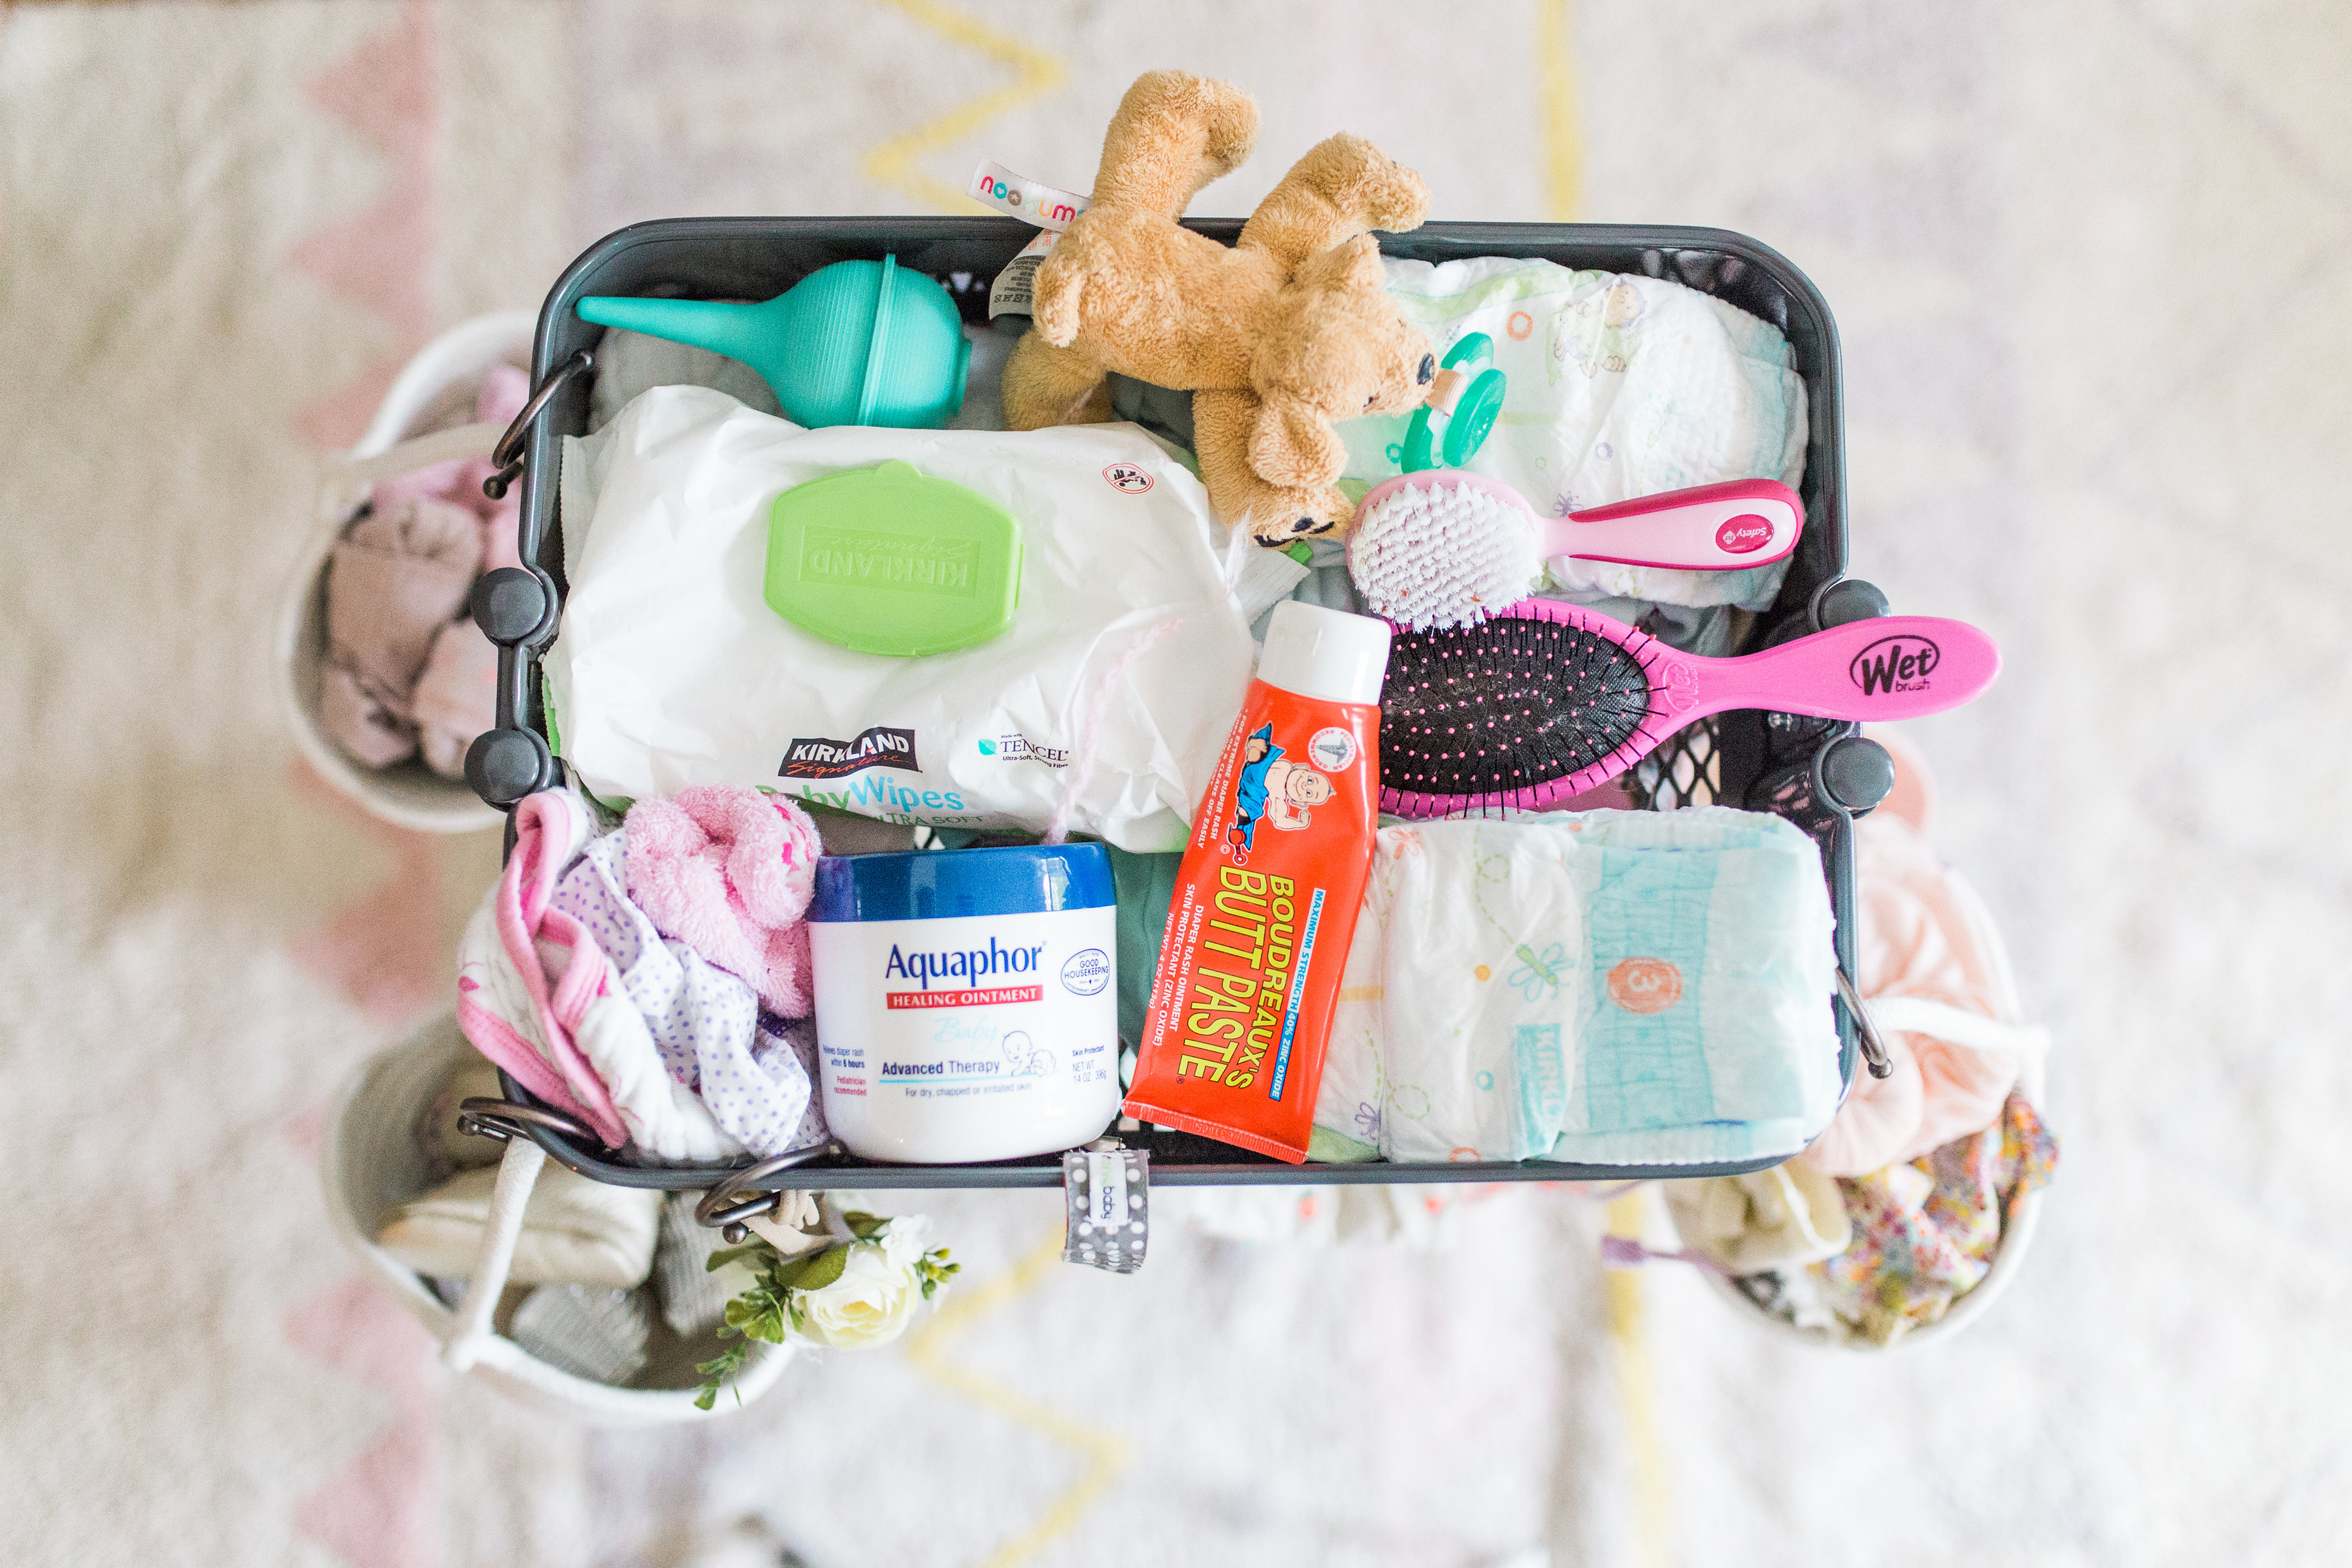
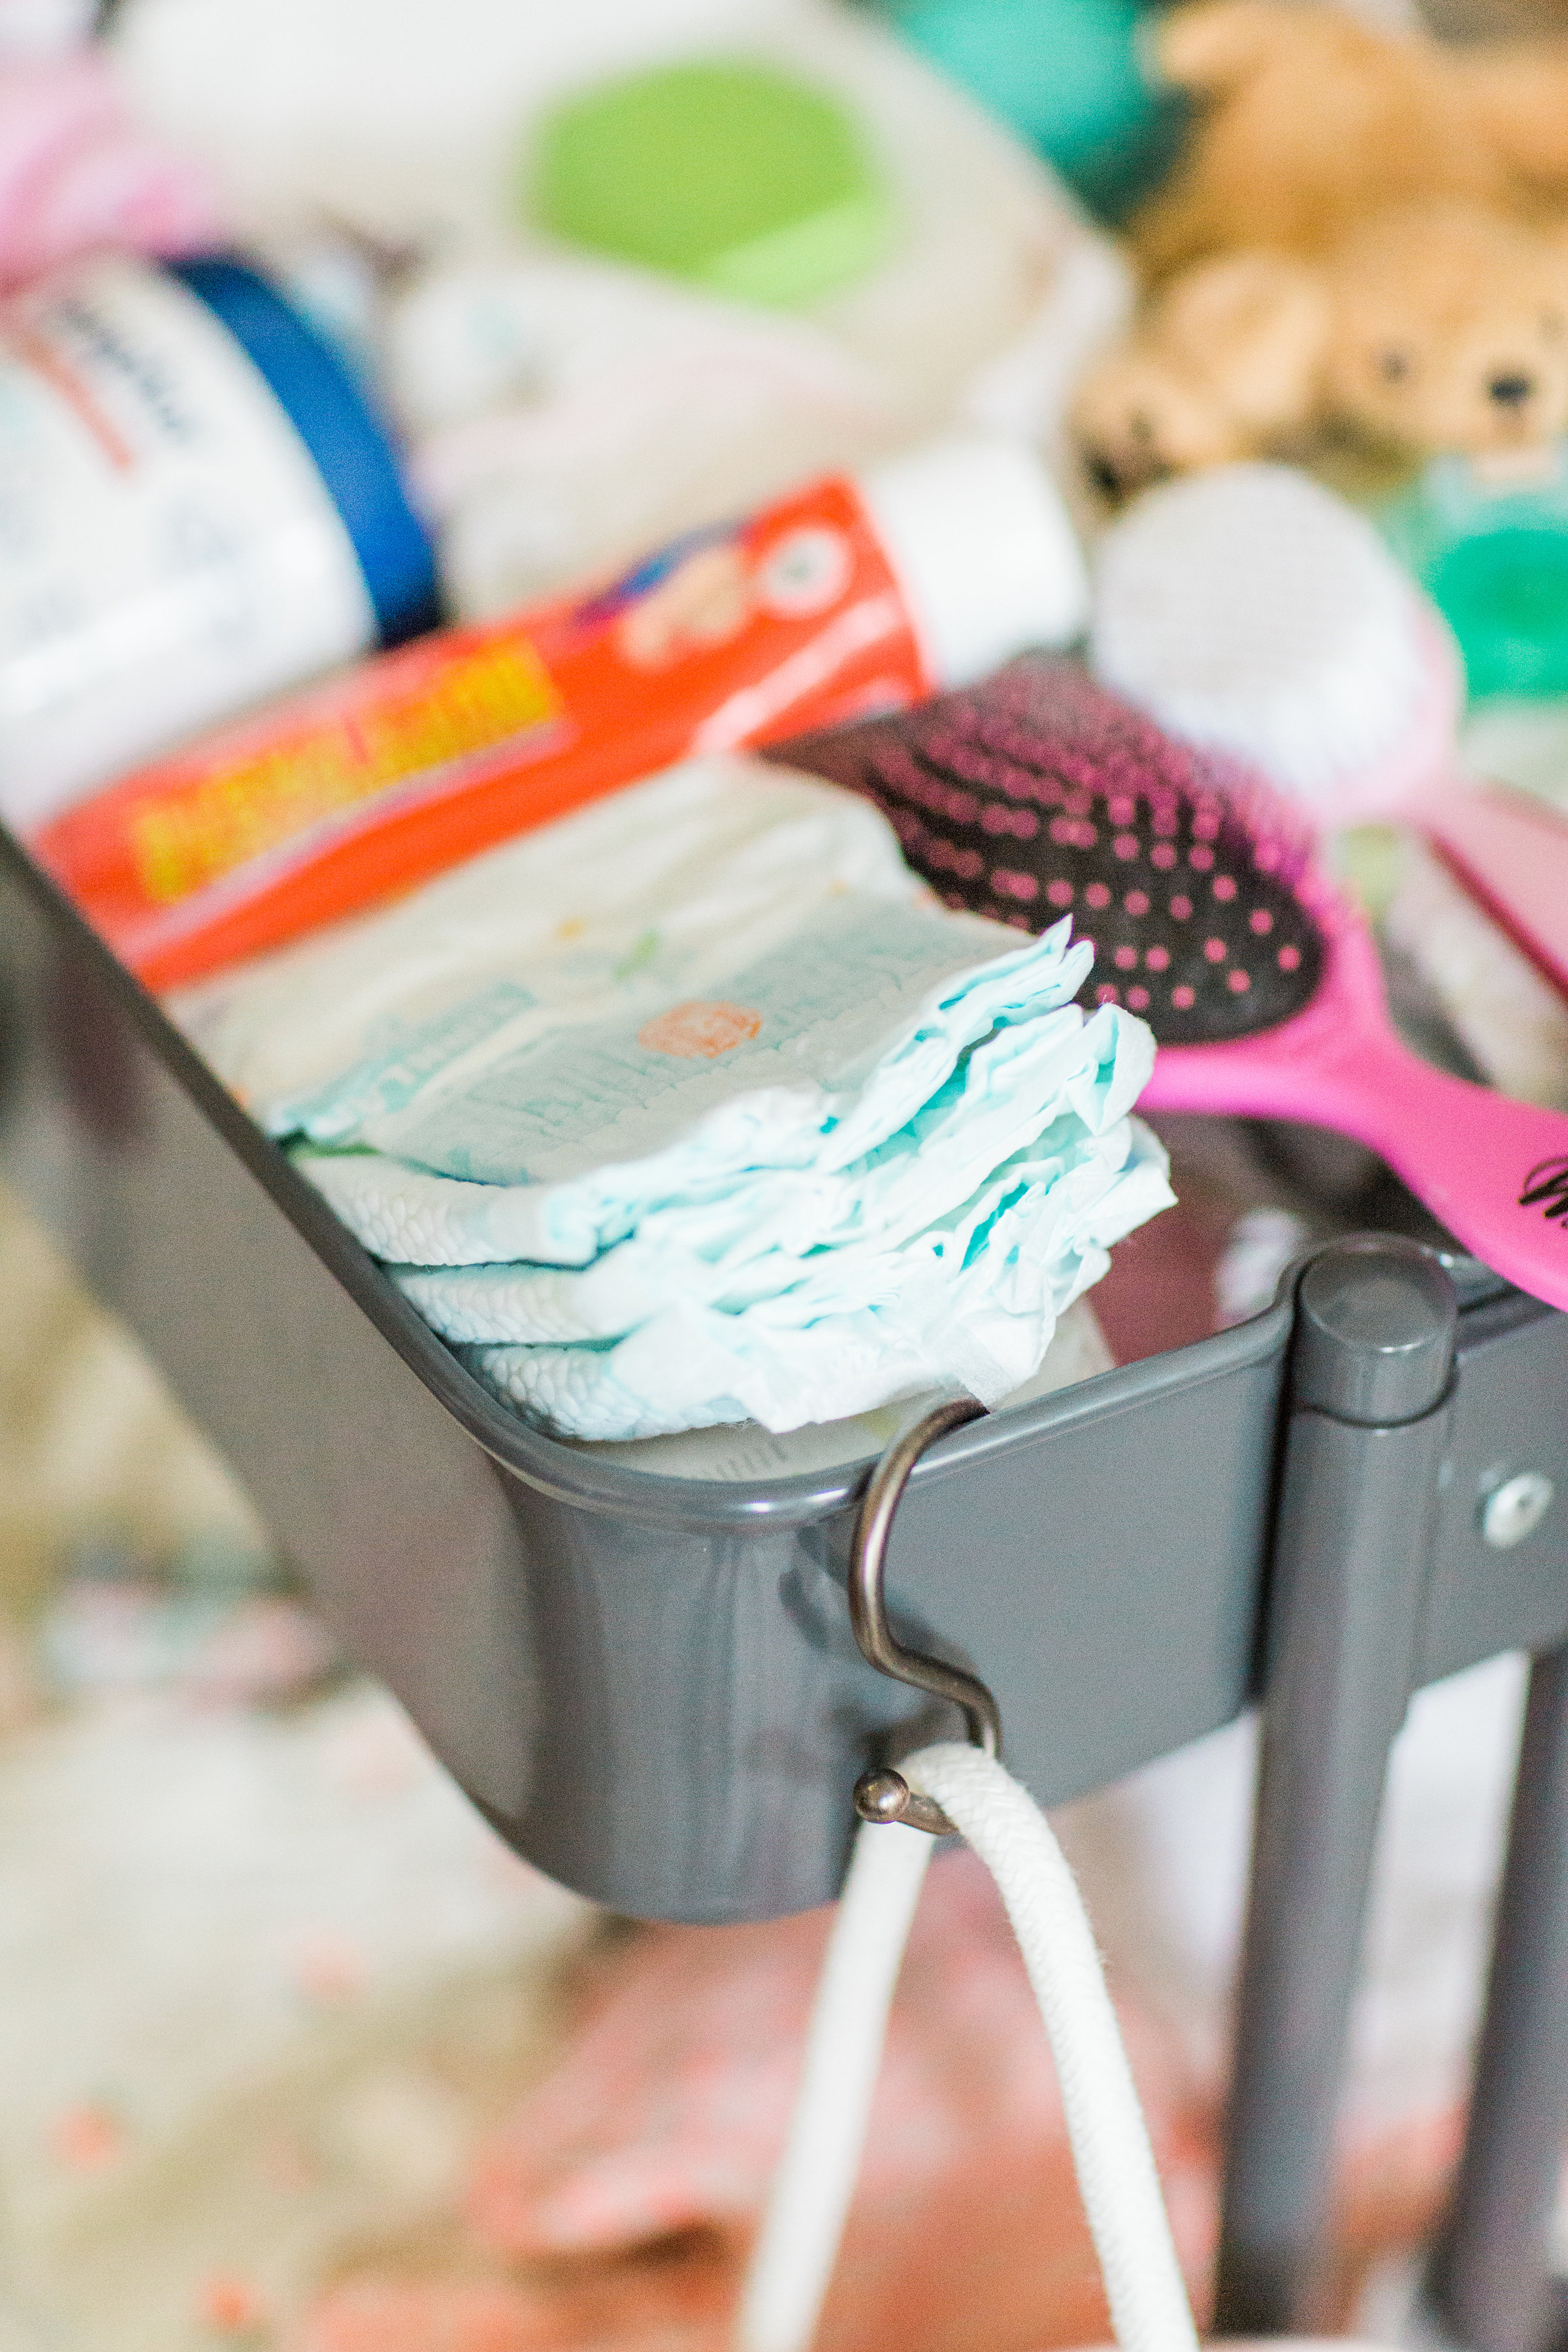
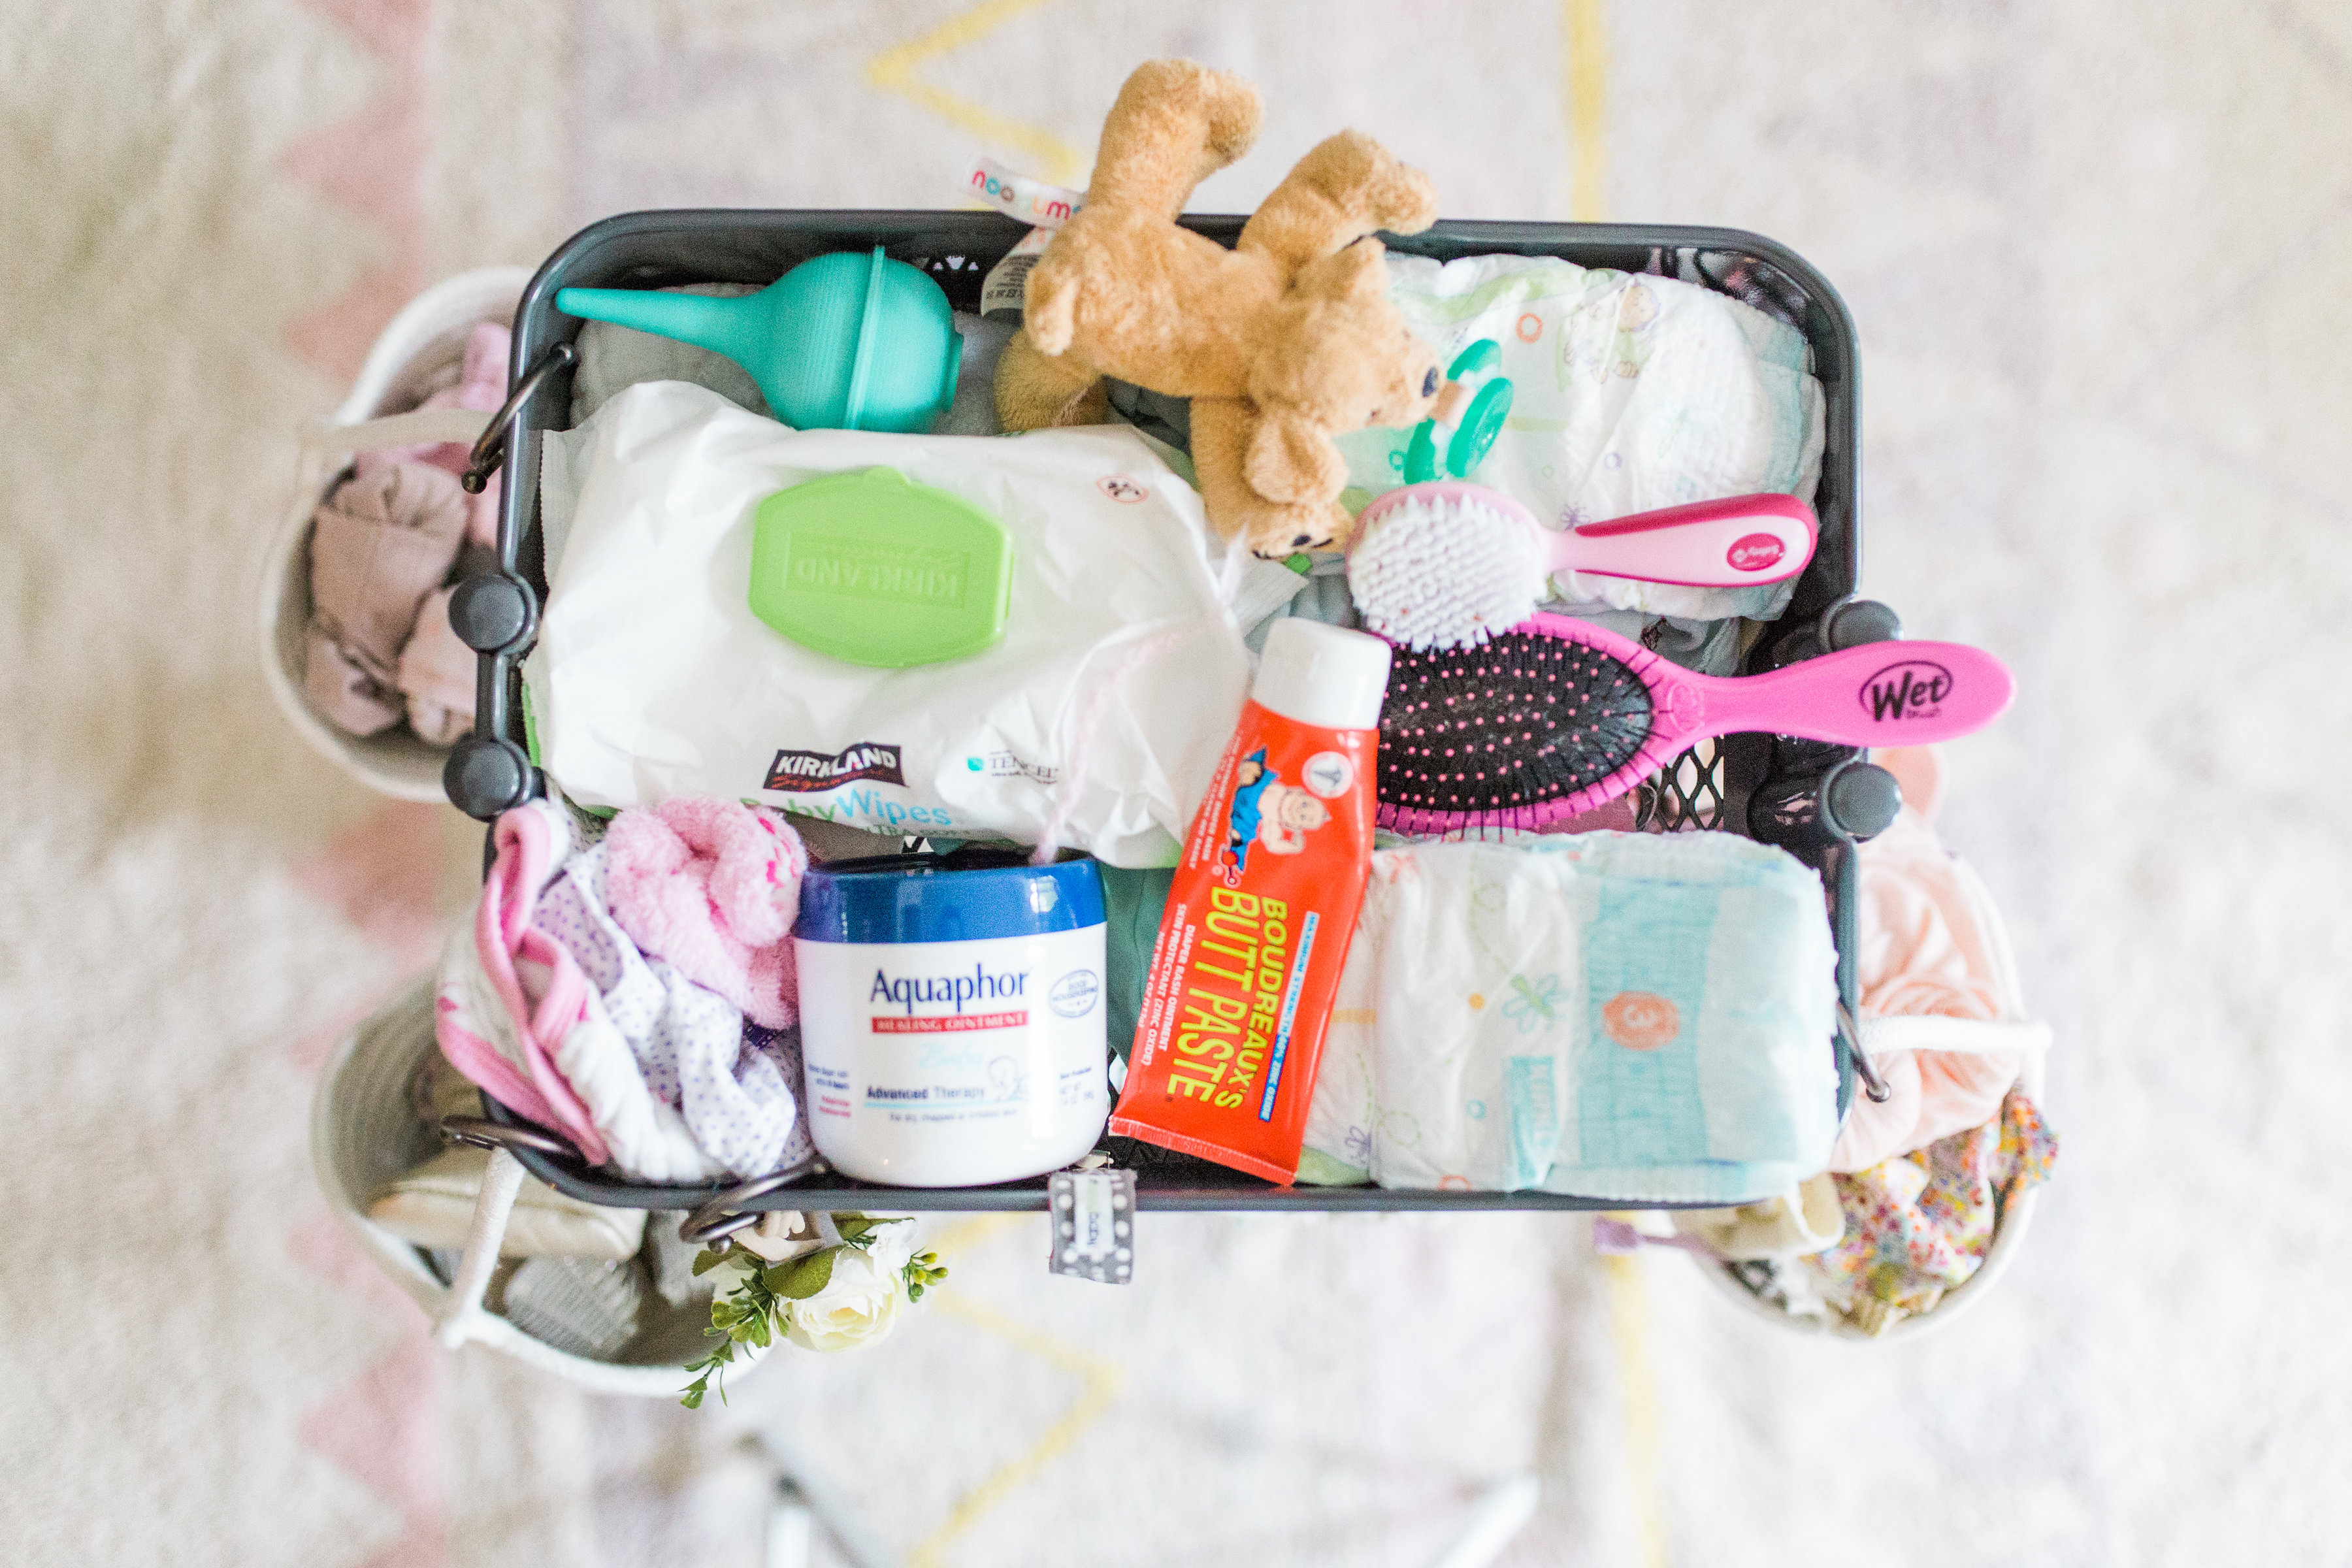
- changing station supplies:
- diaper cream (We love this brand!)
- Aquaphor
- diapers
- wipes
- baby brush (We have and love this one and this one!)
- pacifiers
- pacifier clips
- baby hats, bonnets, hair bows, etc.
- lotion
- sun block
- baby socks
- several onesies
- several outfits
- swaddles and blankets
- burp cloths
- bibs
- nose bulb or NoseFrida
DIRECTIONS
- Fill your bottom two shelves with onesies, most-used outfits, swaddles and burp cloths.
- Use the top of the cart to store things like diapers, wipes, diaper cream, a hairbrush, nose bulb, etc.
- Using your S hooks, hook a few of your lightweight baskets on the sides of your cart. Fill those baskets with smaller items like socks, shoes, hats, bows, etc. You can also use plastic baby link rings to hang bibs and bandanas.
Do you create any kind of new baby changing station when you bring home a new babe? Or do you hike it to the nursery every time the baby needs a change?
IF YOU TRU THIS DIY, OR DISCOVER ANY HANDY NEW WAYS TO STAY ORGANIZED WITH A NEW BABY, BE SURE TO LEAVE A COMMENT OR TAG ME ON SOCIAL MEDIA (@GLITTERINCLEXI) SO I CAN CHECK OUT ALL OF YOUR BRILLIANT MAMA HACKS!
SHOP THE DIY IKEA RÅSKOG CART BABY CHANGING STATION POST | CLICK LEFT & RIGHT ARROWS TO EXPLORE

LOVE THIS DIY POST? SEE MORE OF OUR PROJECTS RIGHT HERE!
Photos by Annie Watts Photography for Glitter, Inc.
SaveSave
Join the Fun


 Older Post